
Moving a Non-Profit Wordpress Site to Free Hosting on Azure
So let’s start with the easy and fun stuff first: the for free part! Microsoft has a fantastic donation program setup for most non-profits to get $5000 per year in free Azure computing. It’s pretty fantastic. If you have 501(c)3 status (or the equivalent in your country) pop over to the Azure donation website, double check that you meet the eligibility requirements (no political orgs, no government orgs, stuff like that) and start the application process. It costs you nothing to apply and even if you aren’t planning to use it to host your website like I outline here, $5000 in free compute is hardly a liability. Spin up a massive GPU instance and mine bitcoin at the least!
I’m long-time volunteer for a small Christian non-profit that does leadership and character development in young musicians. I figured after getting my hands on this free Azure compute, it made sense to move the organization’s website to there. Azure has their versions of containers called “Azure Web Apps” that make it pretty brain dead simple to manage web applications. You just worry about keeping Wordpress up to date, and Azure handles all the security updates, redundancy and maintenance of the underlying infrastructure. Much faster than your standard $10 a month shared webhosting without too much more pain.
General Caveats and Disclaimers
Real quick though, does regular shared webhosting actually meet your needs? If so, you should probably checkout Dreamhost’s 100% free shared webhost plan for 501(c)3 non-profits instead. They’re fantastic, and you can get your website up and going quicker, 24/7 support and the whole nine yards. They’re even carbon neutral for crying out loud! They weren’t enough for the level of traffic my org started to get, but they were a great home for us for the first few years we were expanding our web presence.
Second, if you’re mucking around with your non-profit’s WordPress website take backups. Take a bunch of them. Have two copies of the files in different places, and don’t forget backing up the database as well. If you screw up your website, make sure you can go back and restore to a copy that you know works.
Third, I’ll try to outline this as simple and straightforwardly as I can, but even with my own technical background I found migrating these sites to be not particularly straightforward. Hopefully this blog post can let you cut out the few days of troubleshooting it took for me to put all the pieces together, but if you have some requirement for your site that wasn’t part of mine you may need to get your hands dirty troubleshooting on your own. At a minimum, you should be okay using an FTP client to upload and download files to follow these steps, and a tiny bit of experience with clicking around phpMyAdmin wouldn’t hurt, but is not entirely required.
If you break your website, it’s not my fault. I’m not going to fix your website just because you read my blog post, cool? Cool.
Okay, I get the warning! I made my backups and redundant backups of the backups. Now how do I do this?
You still with me? Cool. Let’s go about setting up a copy of your org’s Wordpress site on Azure. First, we need to download a copy of the files and a database dump to play around with. If your own WordPress backup solution let’s you grab a copy of those, that’s great! Jump ahead to the next section.
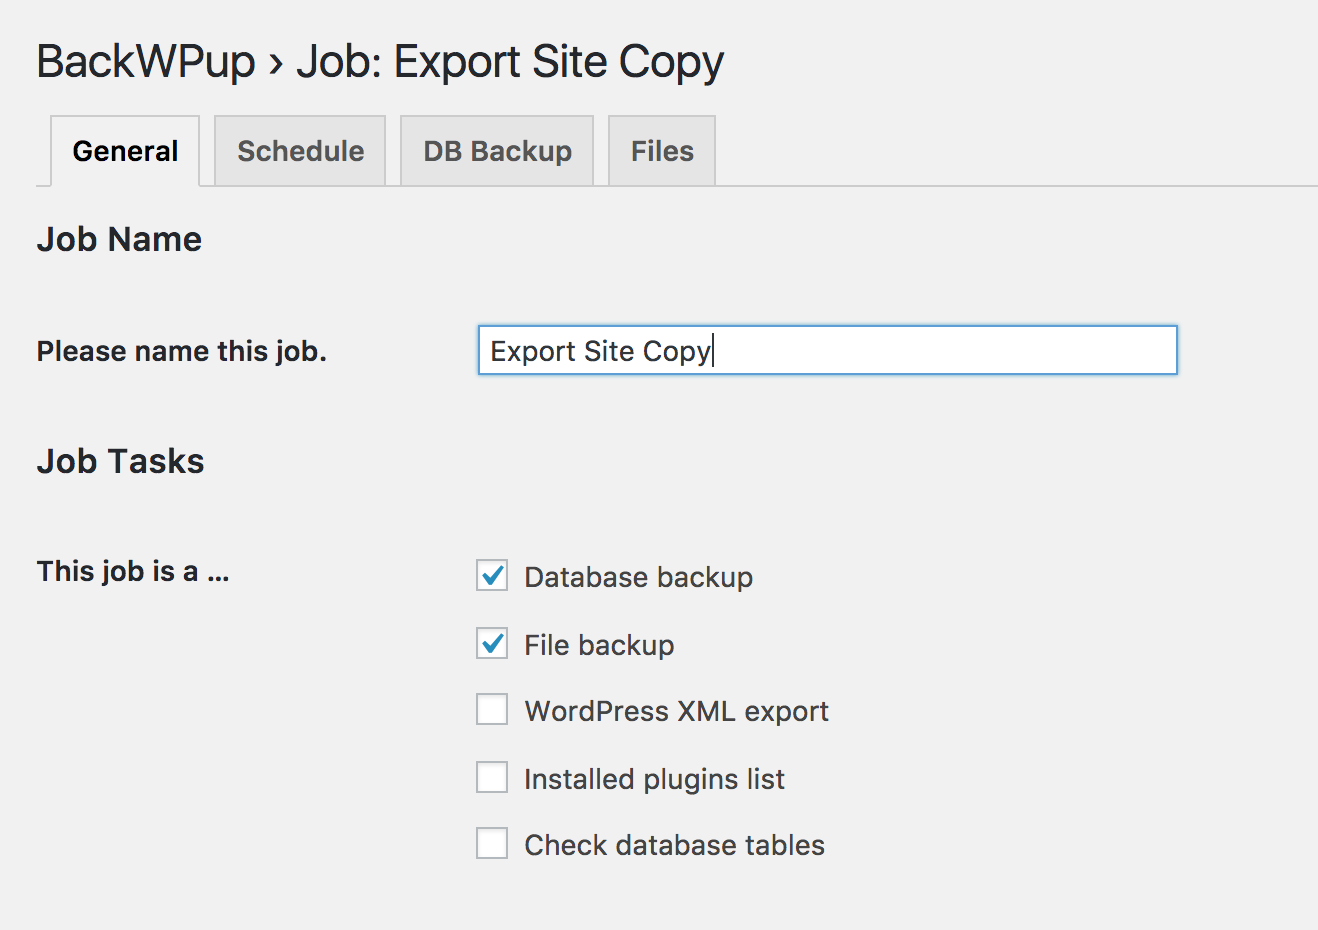
For everyone else, go ahead and install the BackWPup extension on your Wordpress site. It’s free, and it does all the backups that we need. Install it, activate it, and then go to the settings and make the first backup job. You want to check the Database Backup and File Backup options.
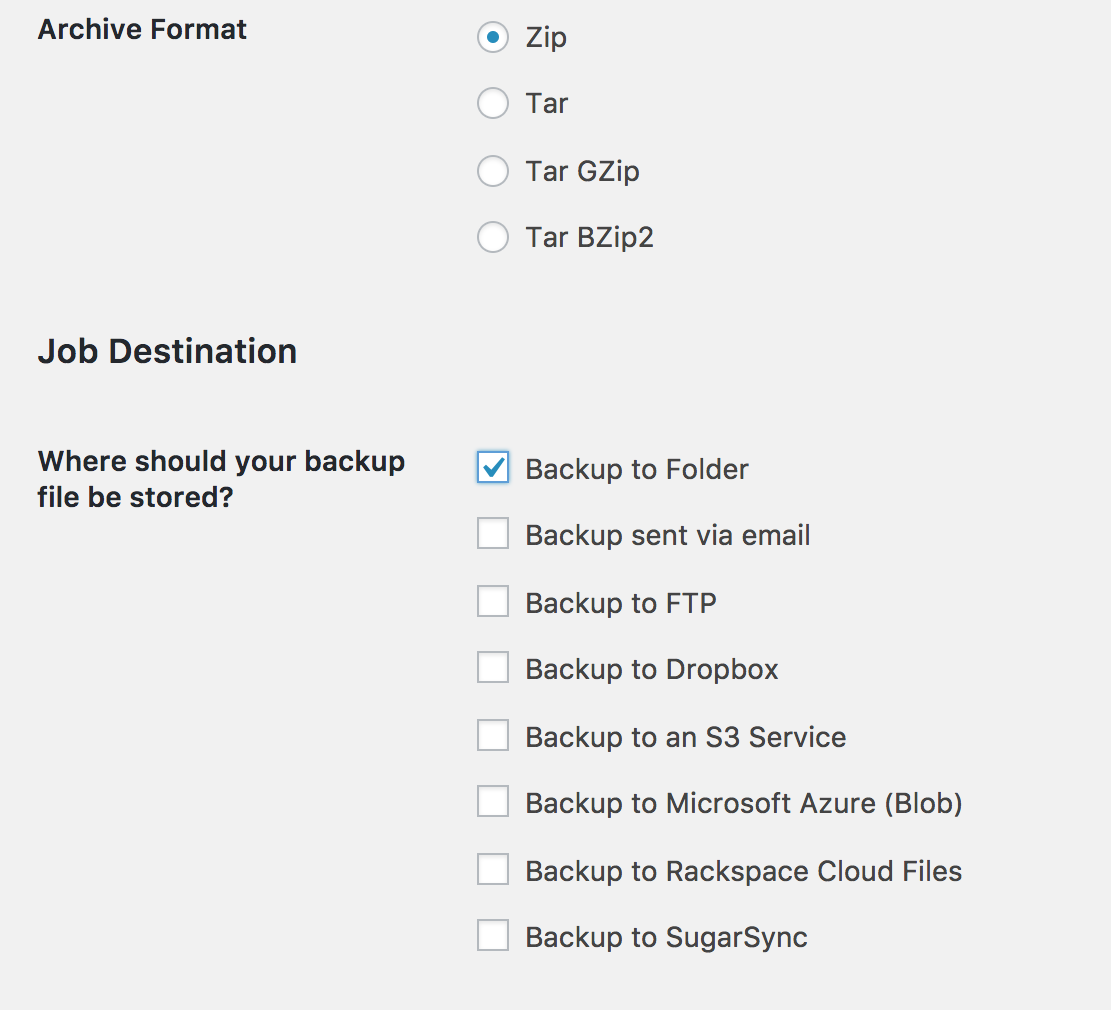
Scroll down and select the Job Destination as “Backup to Folder” (storing it at the same place as your current WordPress site)
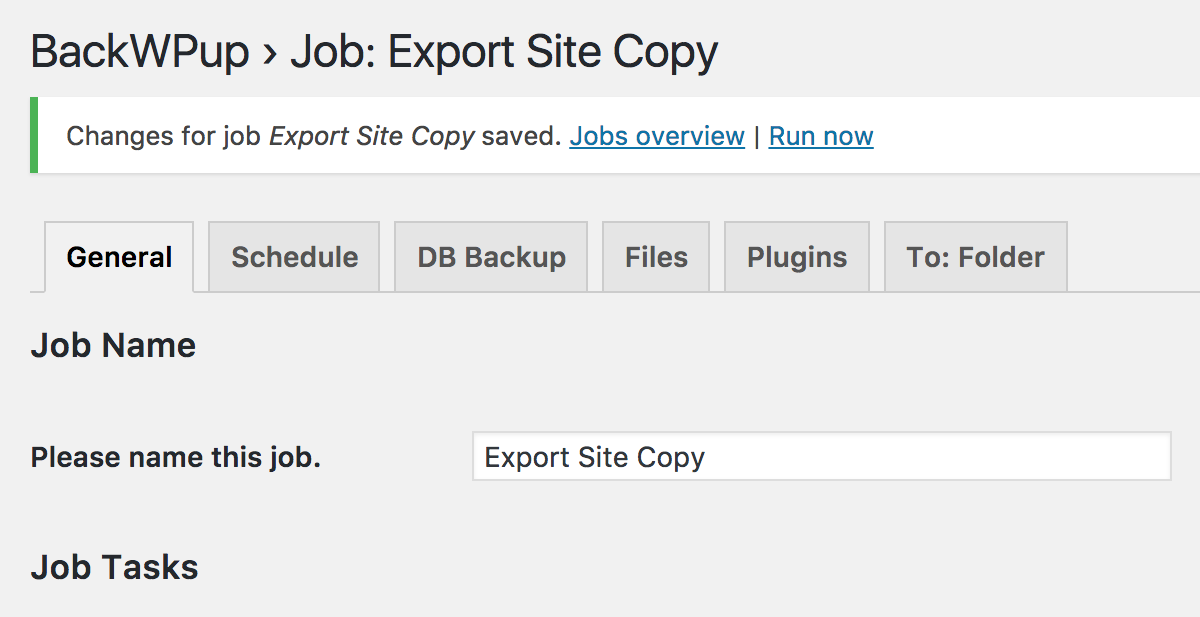
And then when you hit the save button, hit the link that pops up at the top of the screen to run the backup job now. Once it finishes, download the zip backup file that it made.
Spinning up a blank Wordpress instance in Azure
Now that we have a backup copy of your site, let’s spin up a skeleton WordPress instance to as a framework to restore your website on top of.
Log into your nifty free Azure portal you got donated to you, and the left side menu hit “All Resources” and then the “+ Add” button at the top of the page.

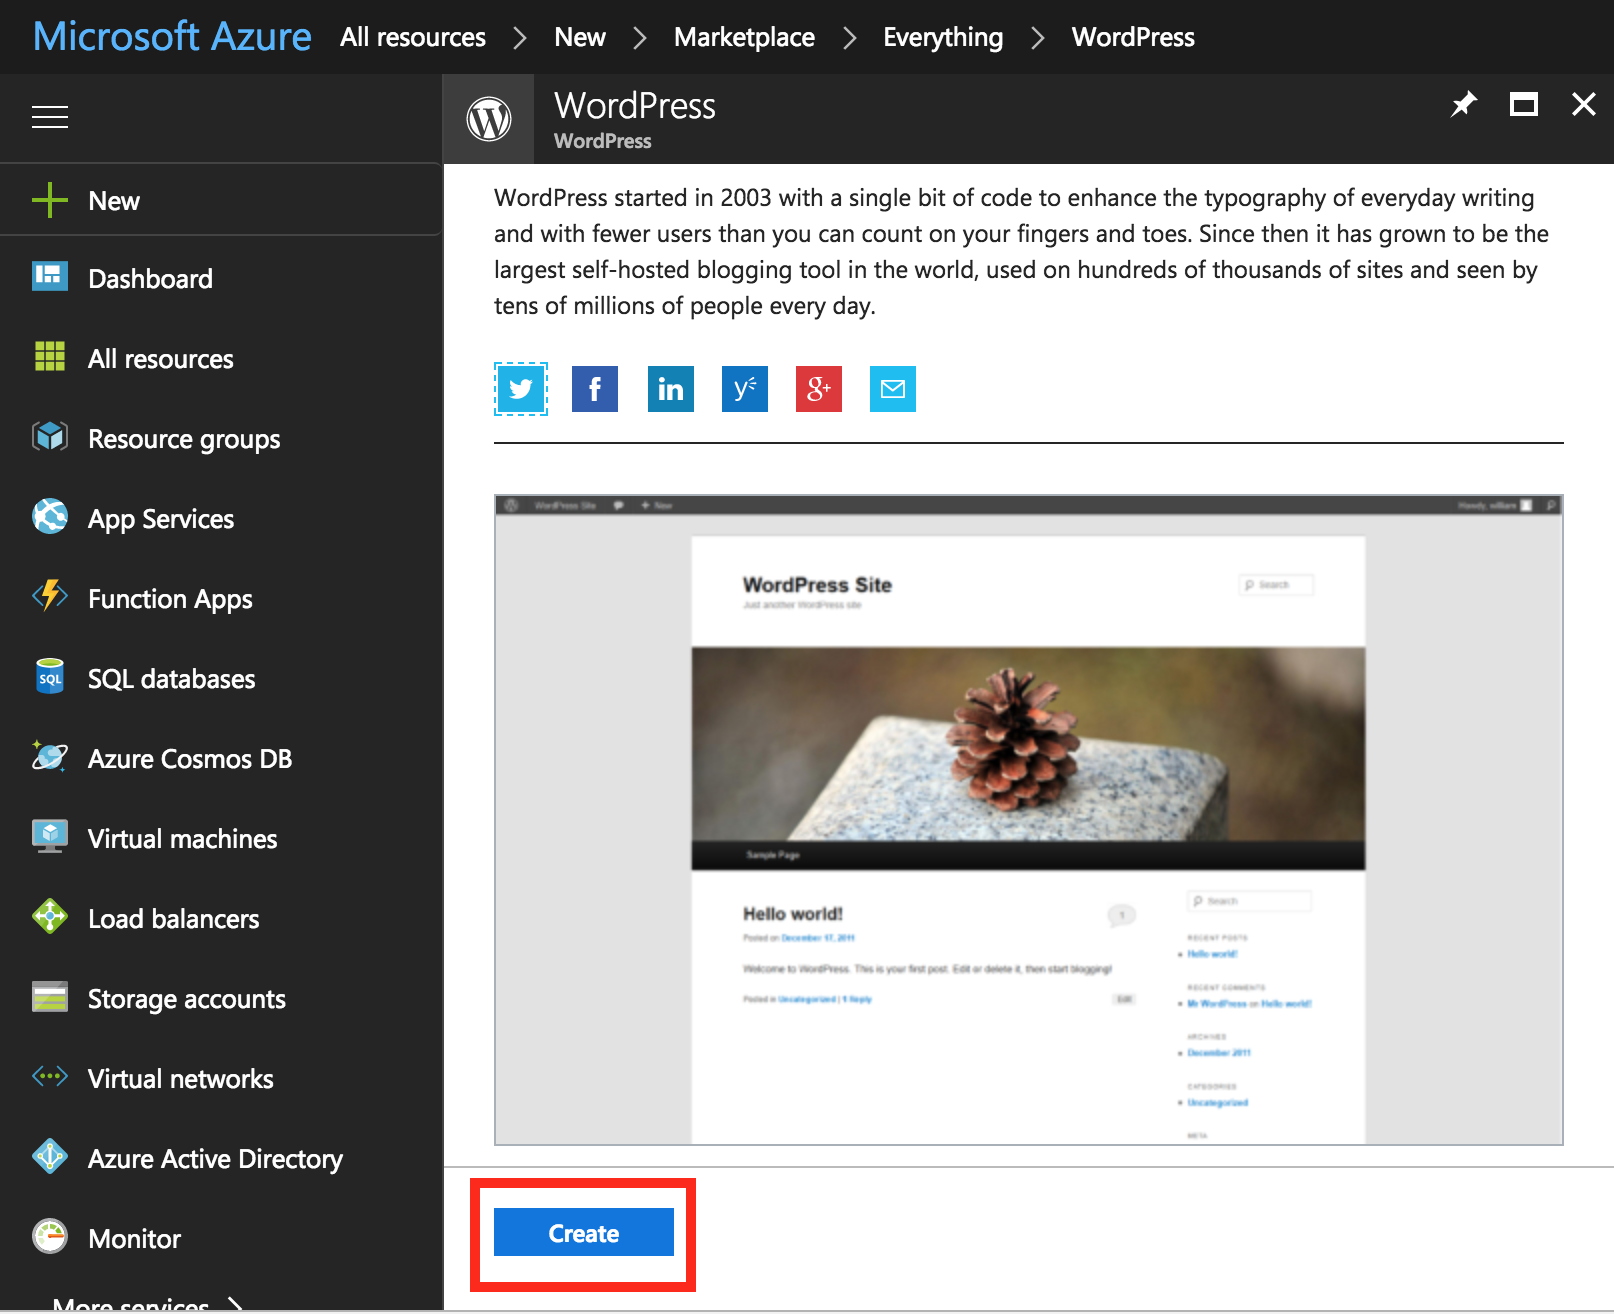
Azure has their own blank WordPress web app configuration published directly from the WordPress maintainers all set to go. We’ll use that as our skeleton framework. Search “WordPress” in the resource menu.
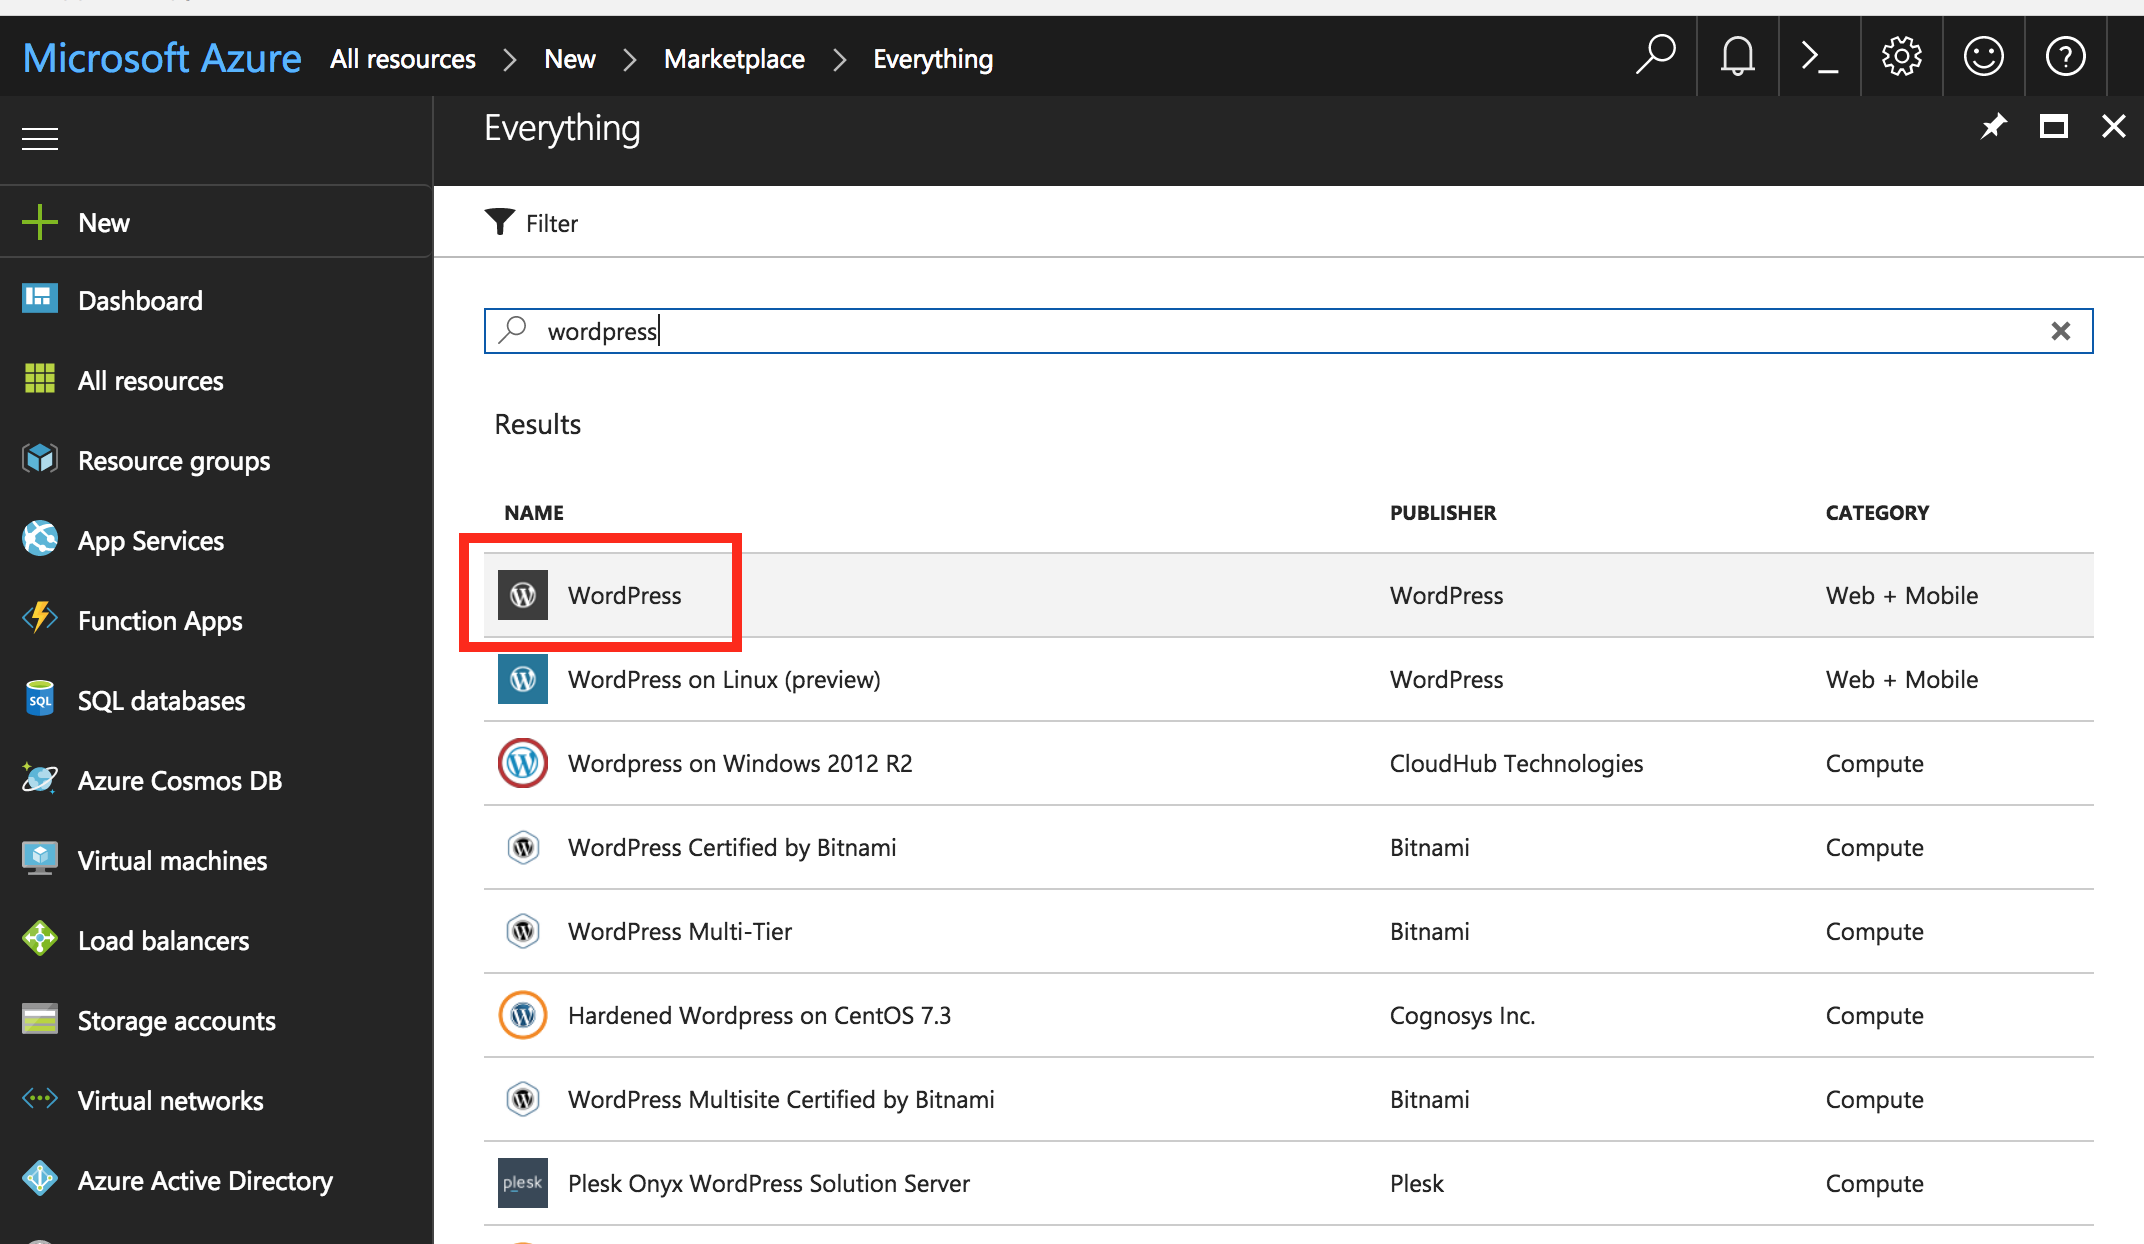
And select the one that just says “Wordpress” When you do, you’ll get a short blurb about Wordpress and the option to hit the “create” button down at the bottom.
Setting up the Azure Resources for WordPress
Azure is going to ask you for a bunch of parameters. It looks more complicated than it actually is.
- App Name - A nice friendly name for the site. This is going to become part of the name for the website that we’ll hit during development of the site; App-Name.azurewebsites.net. We’ll be able to change it later to respond to your supercoolname.com domain, but it’s still a good idea to make it simple and easy for your to remember.
- Subscription - You should just have the one for the sponsorship. Make sure that’s what’s selected.
- Resource Group - This isn’t really important for our needs, but you’ll have to make one. It’s useful when you are dealing with thousands of resources and want to set policy for them all together. Since we’ll be basically dealing with just 3 resources for this, we won’t be doing much with Resource Groups. It’s required though, so just name it whatever you want.
- Database Provider - Select Azure Database for MySQL
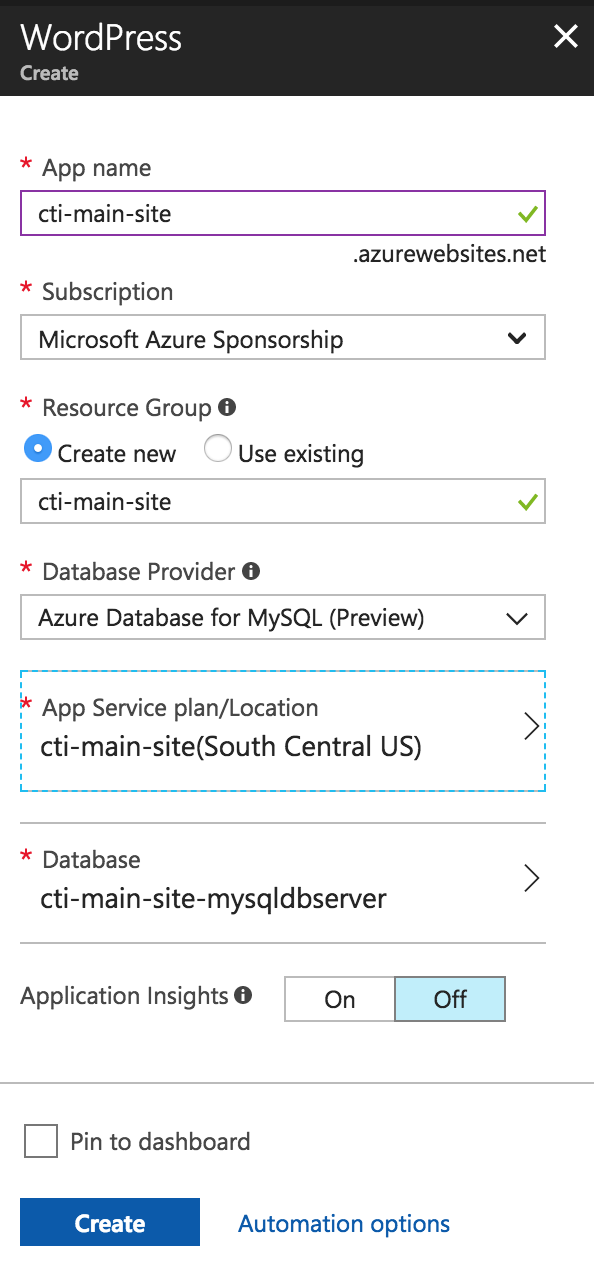
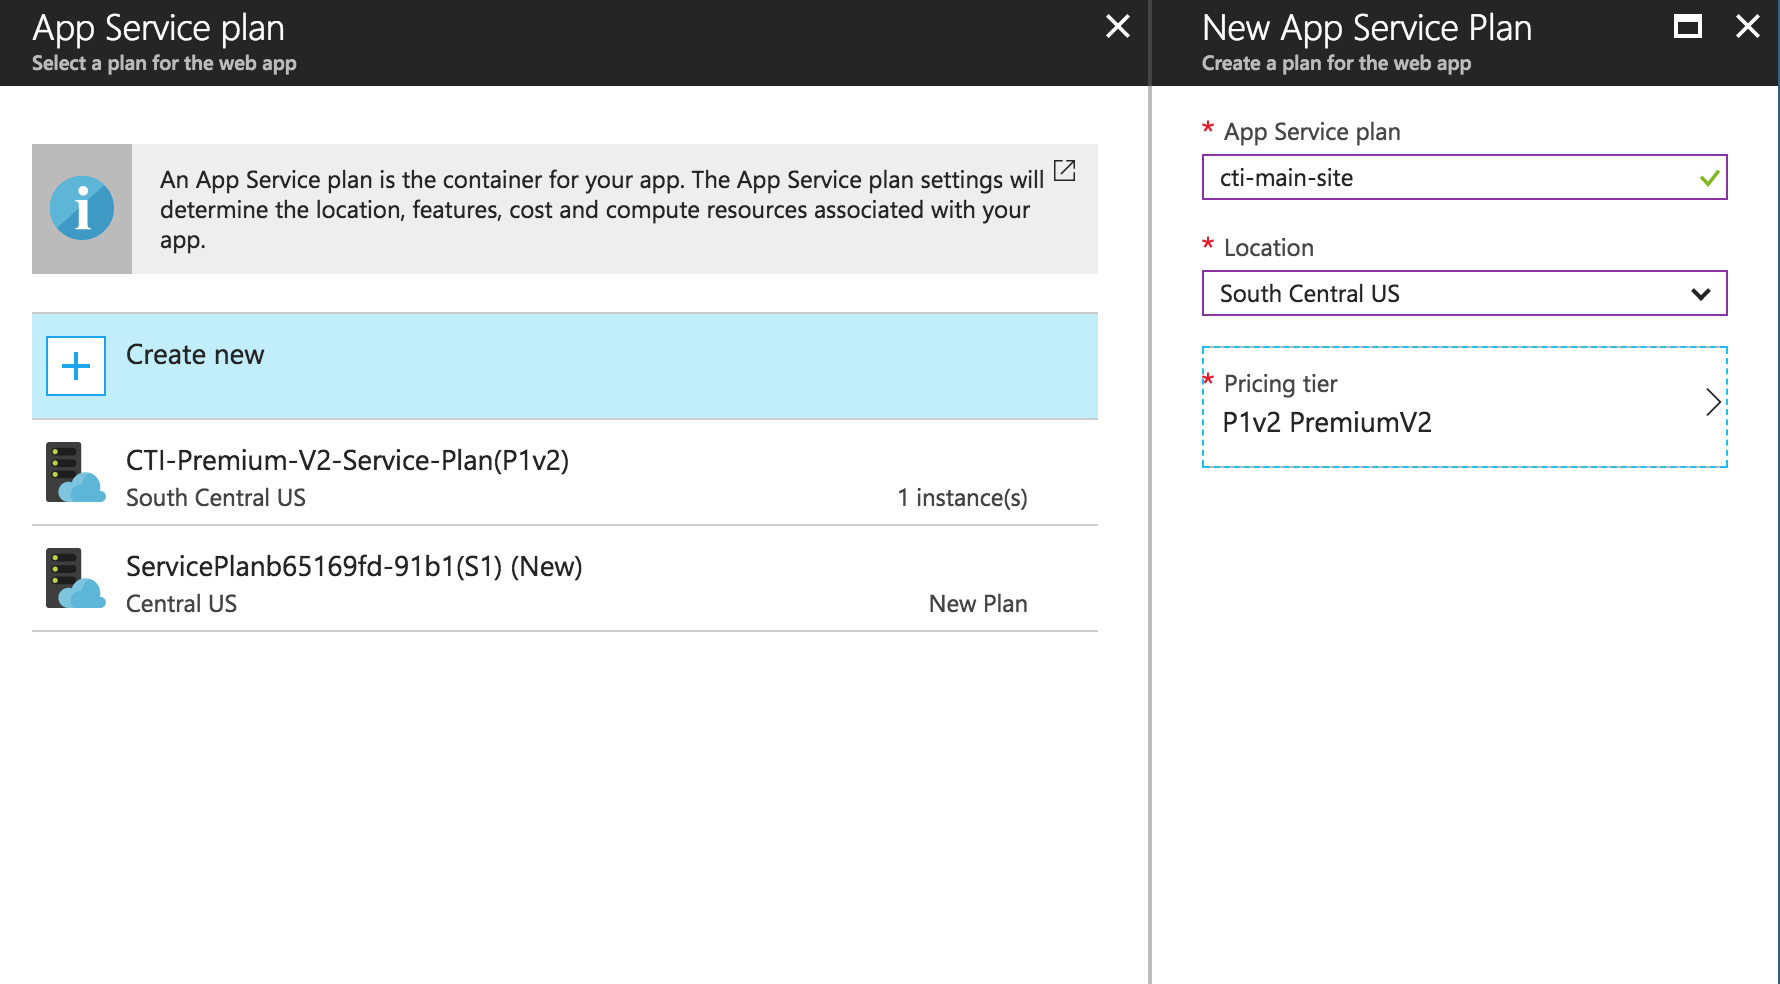
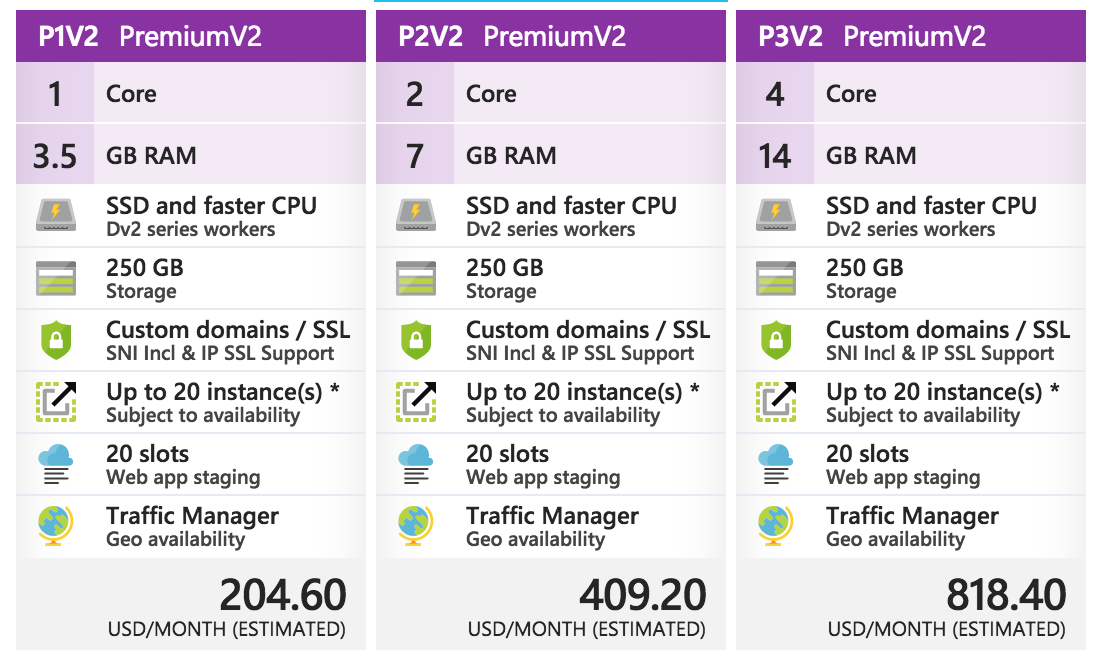
For App Service plan / Location you’ll be choosing what raw hardware in what location you want behind your application. For my site, I chose the P1V2 service plan as it was the cheapest with solid state drives for the storage. ~$205 per month is certainly pricy if we were paying out of pocket, and will eat up about half of our sponsorship, but since website hosting was all that we were hoping to get out of this Sponsorship it was worth it for the performance. You can certainly experiment with smaller app sizes if you have other shiny things you want to do with your sponsorship. You can always upgrade your service plan later if it isn’t beefy enough.
The Premium V2 service plans (with SSD) are only available in certain regions as of this writing. South Central US is one, and is closer to our main office than the coasts, but the specific US region doesn’t matter too much. Pricing is slightly different in different places, but it’s all with 5% or so of each other. Again, the naming of the service plan isn’t too important, but you should keep in mind what Location you put it in. Any other resources that you create for this website you’ll want to place in the same Location so you aren’t slowed down by a website running in New York making calls out to California.
If you have multiple websites, you can put them all in the same service plan so long as there’s enough free CPU and memory to cover them all. You don’t need to have one app per app service plan.
When you click on the database, and hit “create new” you’ll get a bunch of settings for your new MySQL database. Again, it looks more complicated than it is.
- Server Name - Doesn’t really matter. Call it whatever you want.
- Server Admin Login Name - Doesn’t really matter. Call it whatever you want.
- Password - Make this long and strong, and save it somewhere just in case you need it. 30 some odd random characters.
- Version - Unless you know specifically that you need MySQL 5.6, default to 5.7
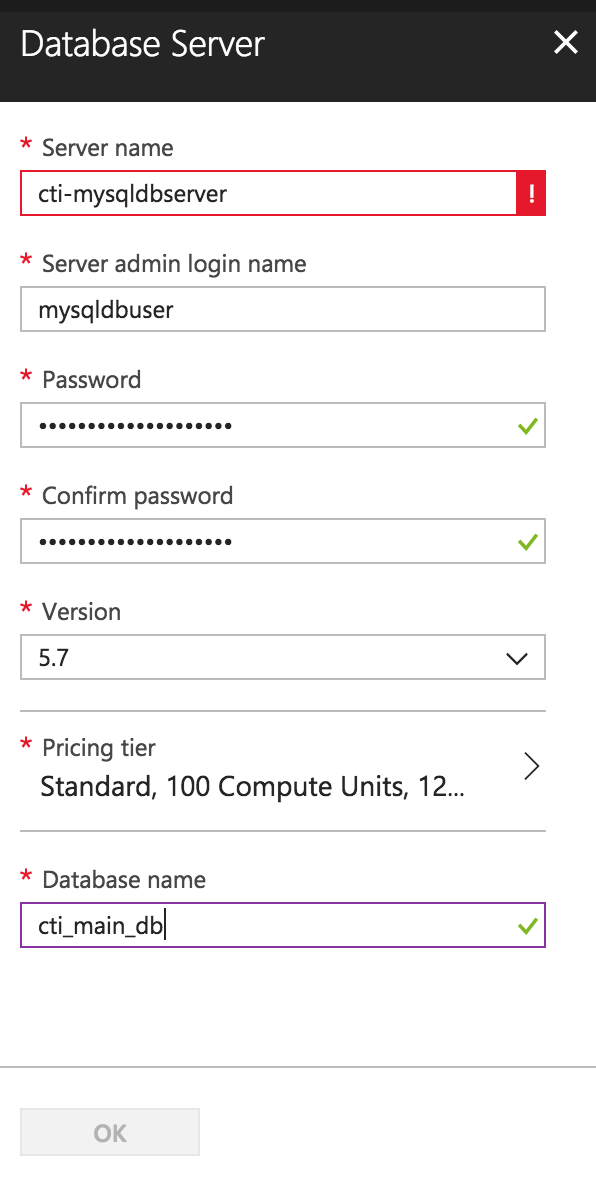
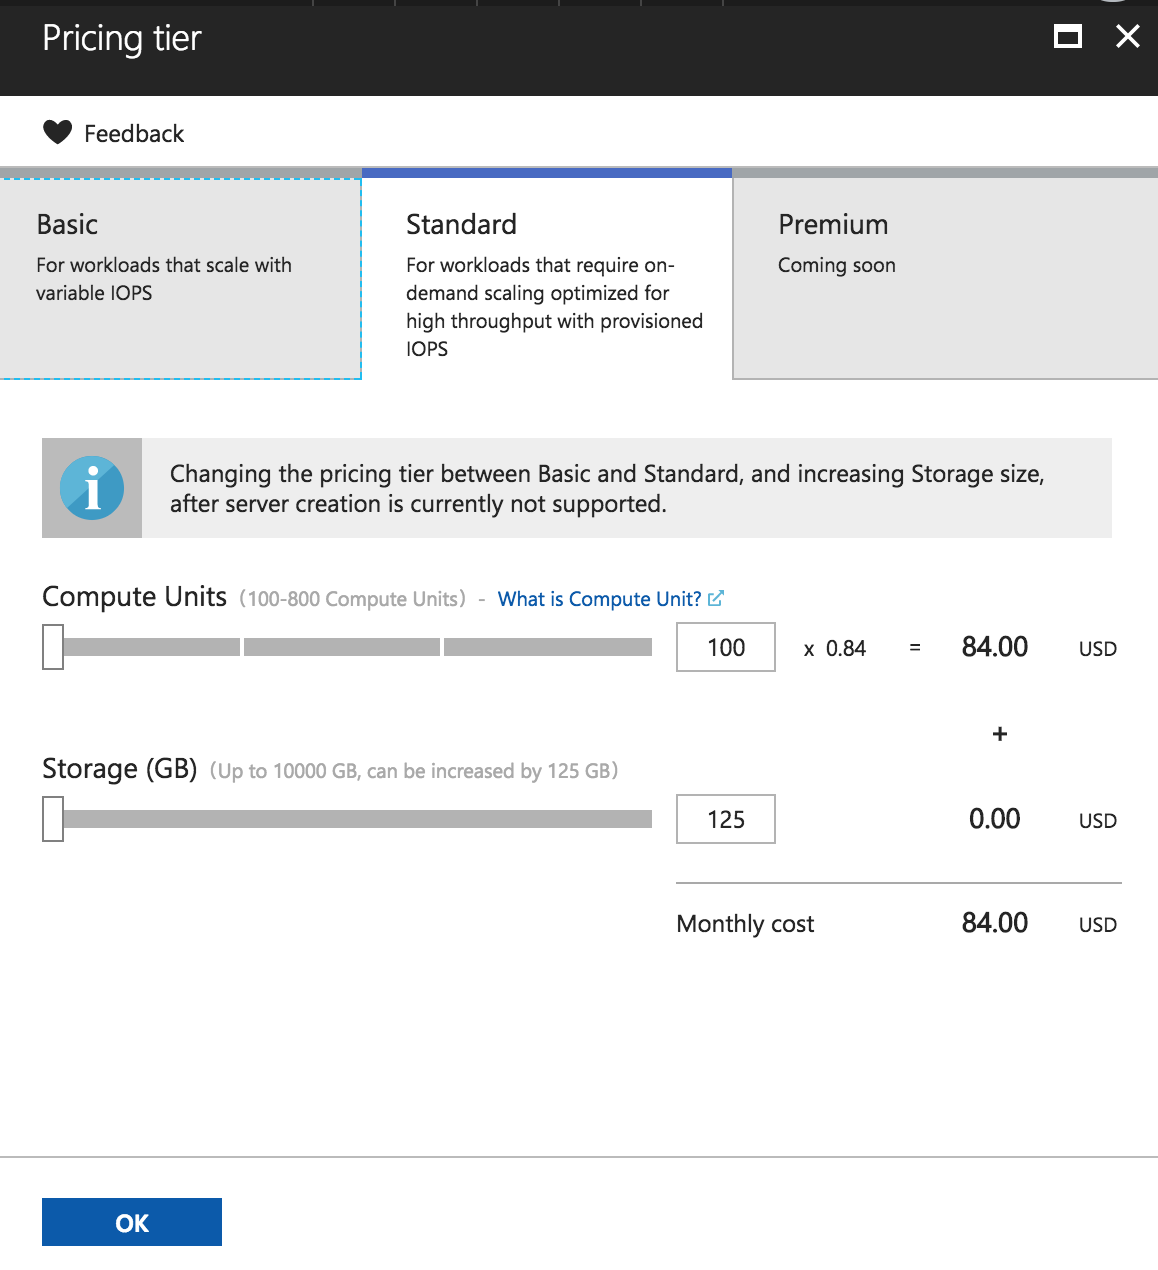
- Pricing Tier - Stick to the defaults, 100 standard units with the 125 GB of storage. That’s waaay more storage than most Wordpress sites need, but it’s free. If you find that you are running out of connection or database slowing, you can always add more compute units later.
Once all these parameters are in place, you can hit the “create” button for the database and the “create” button for the Wordpress app itself. Go get a cup of coffee and come back in a little bit.
We got WordPress, now what?
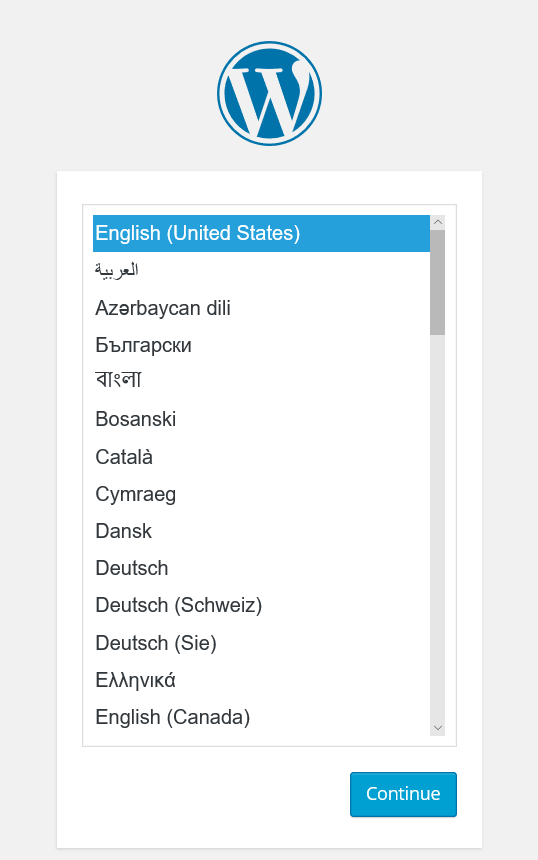
So once Azure is done spinning up all the building blocks, you can visit your app-name.azurewebsites.net URL, and you should see the initial WordPress installation screen where it asks you to choose the language for the install.
If your site isn’t all that complicated, you certainly can run through the install process and just re-install everything manually and copy over the things by hand. For my orgs site, though, there’s multiple years worth of blog posts so any sort of manual one-by-one copying was strictly out of the question.
Starting with file uploads
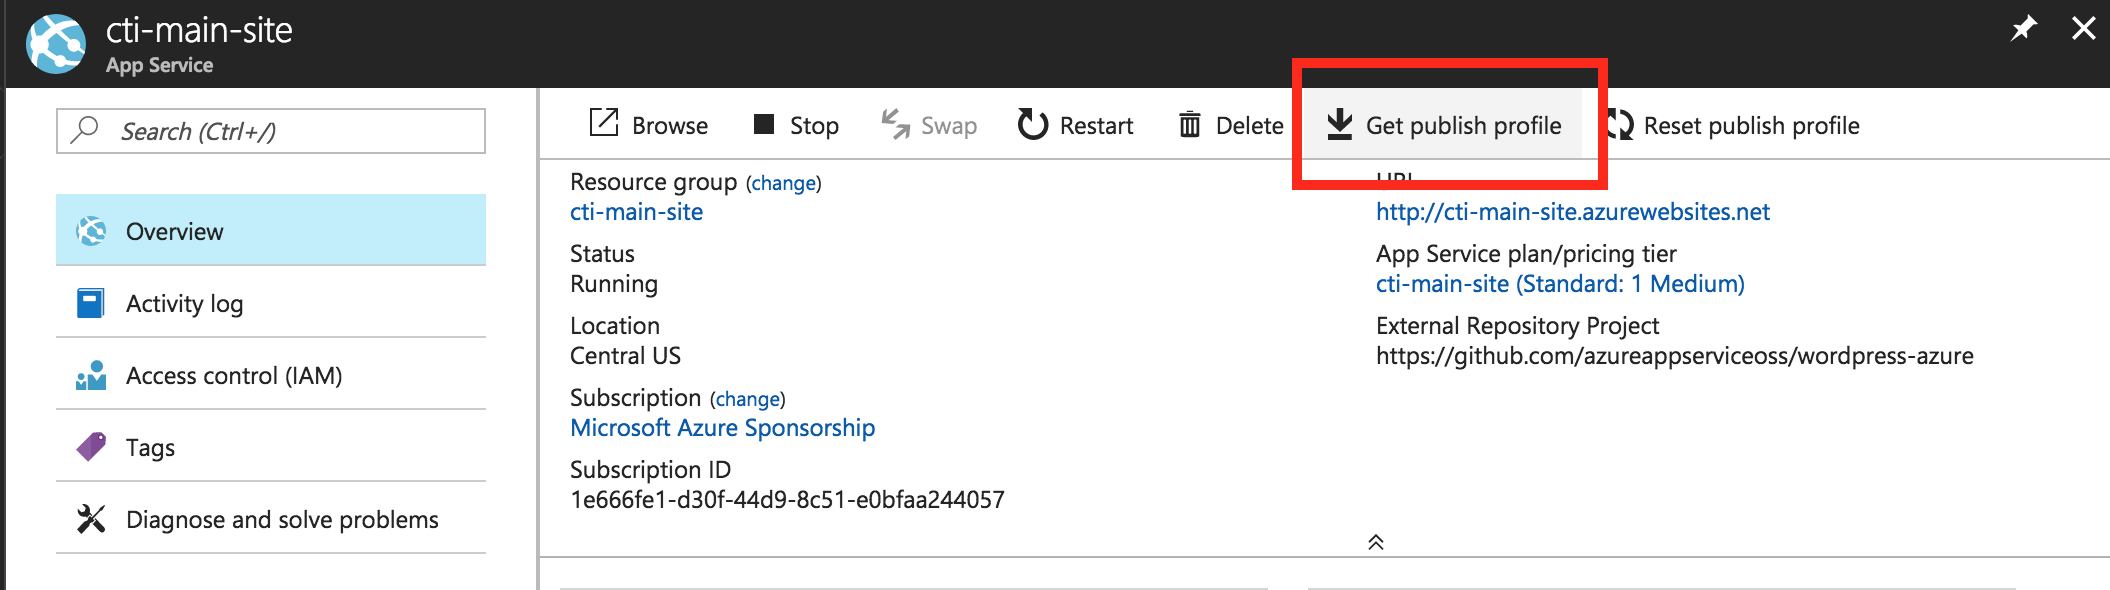
We’ll use FTP to push a copy of the files we’re going to upload. To get your app’s FTP credentials, click on your App Service that was just created, and from the overview tab click the “Get Publish Profile”
When you do, you’re going to get a gross looking XML file that when you open it up in a text editor is going to look something like this:
<publishData><publishProfile profileName="junk-creds - Web Deploy" publishMethod="MSDeploy" publishUrl="junk-creds.scm.azurewebsites.net:443" msdeploySite="junk-creds" userName="$junk-creds" userPWD="JLgYaqoMit6JzXlumPsKLkR2zGCHLE5rgRpf02E9bARozPNC75FhnRarH4GC" destinationAppUrl="http://junk-creds.azurewebsites.net" SQLServerDBConnectionString="" mySQLDBConnectionString="" hostingProviderForumLink="" controlPanelLink="http://windows.azure.com" webSystem="WebSites"><databases /></publishProfile><publishProfile profileName="junk-creds - FTP" publishMethod="FTP" publishUrl="ftp://waws-prod-sn1-141.ftp.azurewebsites.windows.net/site/wwwroot" ftpPassiveMode="True" userName="junk-creds\$junk-creds" userPWD="JLgYaqoMit6JzXlumPsKLkR2zGCHLE5rgRpf02E9bARozPNC75FhnRarH4GC" destinationAppUrl="http://junk-creds.azurewebsites.net" SQLServerDBConnectionString="" mySQLDBConnectionString="" hostingProviderForumLink="" controlPanelLink="http://windows.azure.com" webSystem="WebSites"><databases /></publishProfile></publishData>
(If you can’t open it, try renaming the extension to .txt)
Now search that file for the string publishMethod=”FTP” and you should find a stanza that looks something like this when you throw in a few line breaks.
...
<publishProfile profileName="junk-creds - FTP"
publishMethod="FTP"
publishUrl="ftp://waws-prod-sn1-141.ftp.azurewebsites.windows.net/site/wwwroot"
ftpPassiveMode="True"
userName="junk-creds\$junk-creds"
userPWD="JLgYaqoMit6JzXlumPsKLkR2zGCHLE5rgRpf02E9bARozPNC75FhnRarH4GC"
destinationAppUrl="http://junk-creds.azurewebsites.net"
...
This will give you all the credentials that you need to access your site via FTP. I’ll be using screenshots from FileZilla - an open-source, cross platform FTP client - but any FTP client that you’re comfortable with should be just fine.
In Filezilla, open up the site manager (File > Site Manager) and fill in the information from the publish profile.
For these junk creds that I spun up, the site configuration would look like this:
- Host - waws-prod-sn1-141.ftp.azurewebsites.windows.net
- Port - Can be left blank
- Protocol - FTP
- Encryption - Use explicit FTP over TLS if available
- Login Type - Normal
- User - junk-creds$junk-creds
- Password - JLgYaqoMit6JzXlumPsKLkR2zGCHLE5rgRpf02E9bARozPNC75FhnRarH4GC
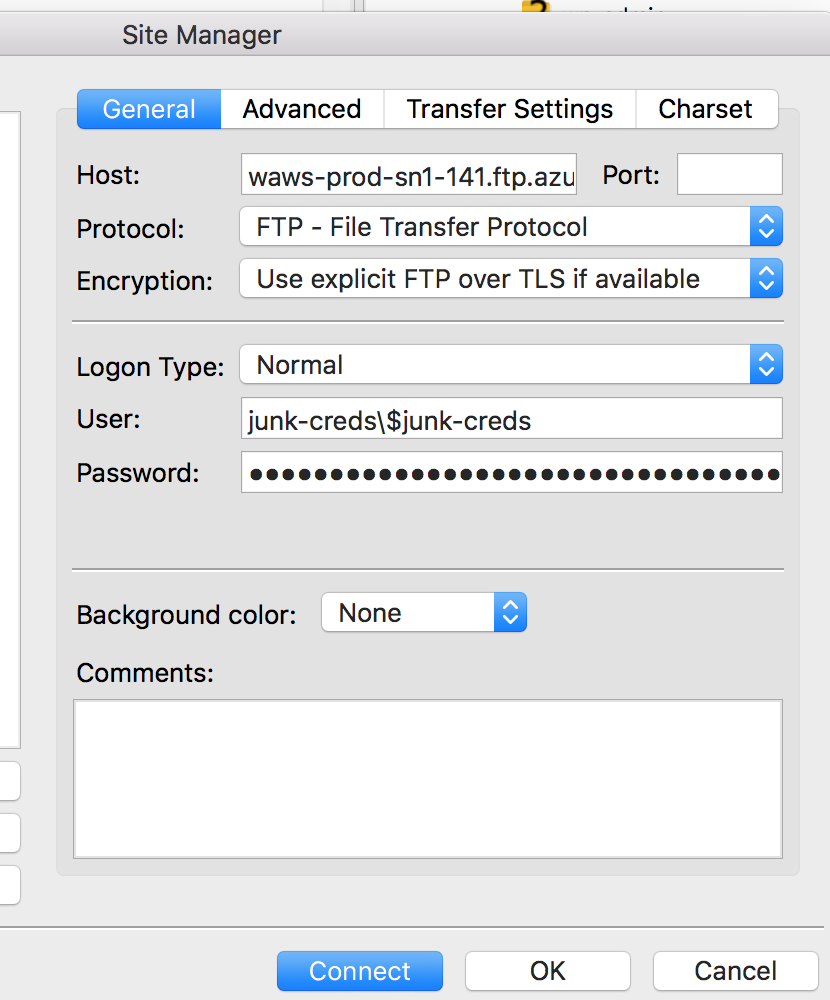
And hit “Connect”
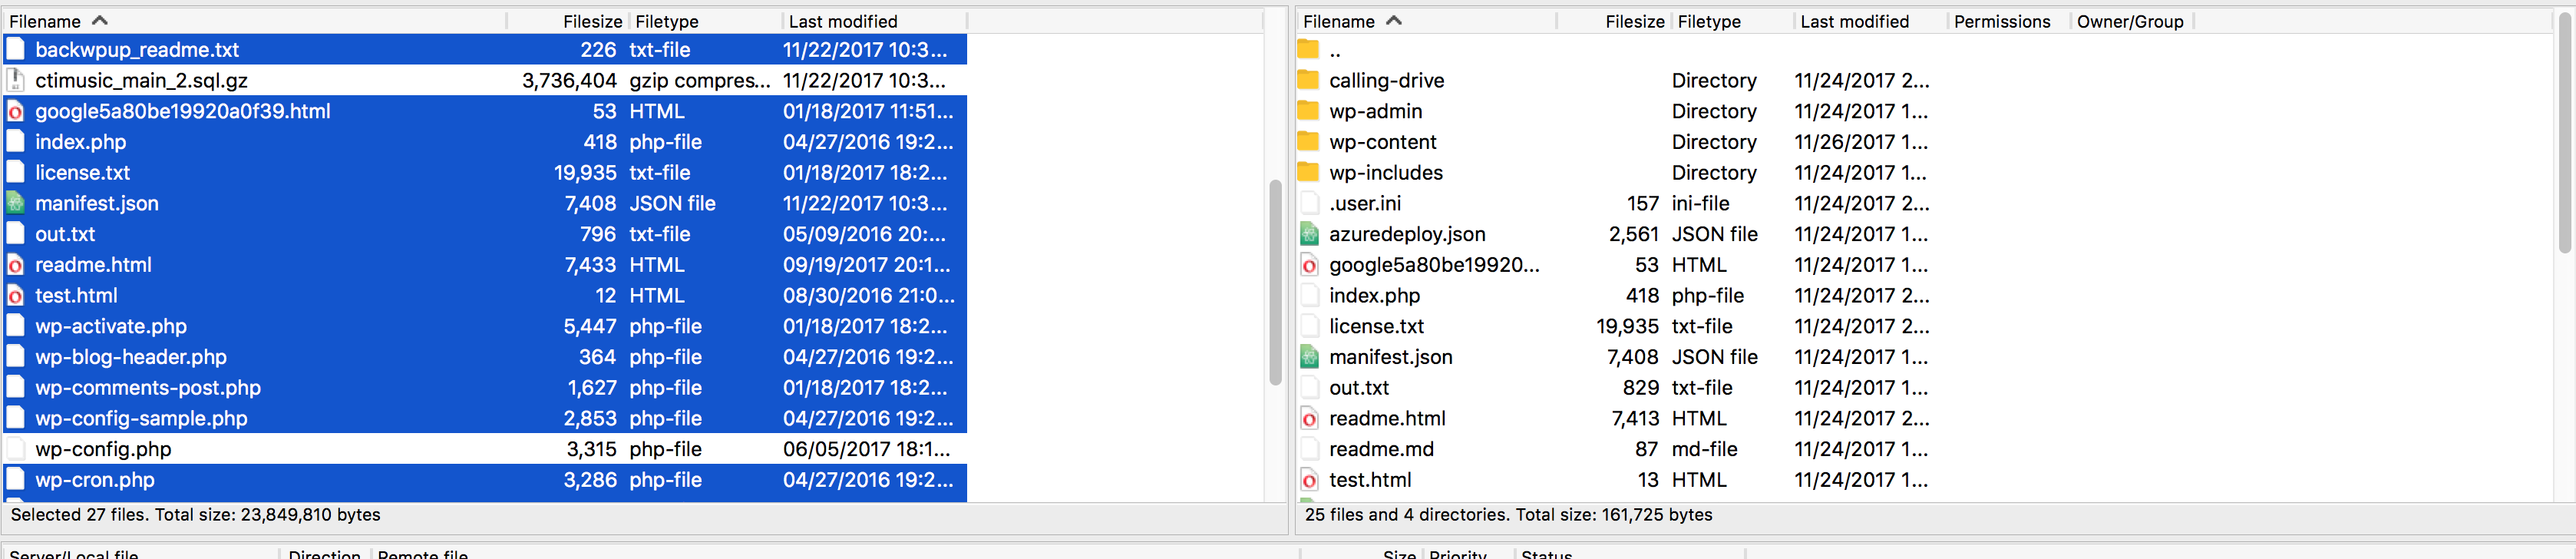
When you connect for the first time, you’ll be prompted to accept the certificate. Accept it, and you’ll get to your more traditional FTP upload. You’ll want to upload everything from inside your backwpup zip backup file except the .sql file for the database and your old site’s wp-config.php
And you’ll be prompted with file conflicts. Go ahead and select to overwrite everything on Azure with what’s in your backup file.
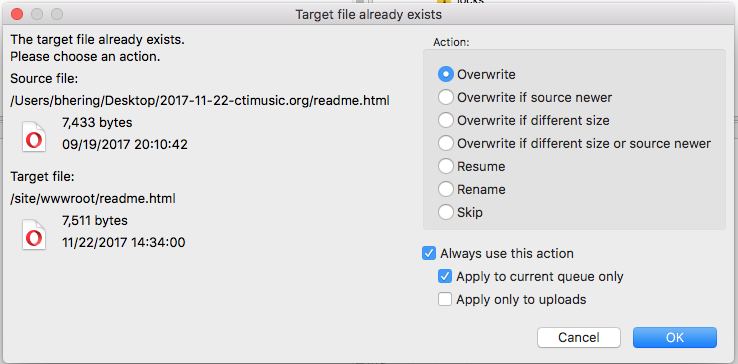
Now let that rip in the background. It may take a while.
Wait, isn’t the wp-config.php file important?
It is, but Microsoft has added in a couple of nice security features and automation around it to automatically tie it in to the ClearDB database that you made in the first part. With most normal WordPress installs, if someone can get a copy of your wp-config.php file, it’s game over. It has your database credentials, and once someone can access your database they can add a new admin, delete all your site configuration or all sorts of nasty things. With Azure, however, their database section of the wp-config.php file looks like this:
$connectstr_dbhost = '';
$connectstr_dbname = '';
$connectstr_dbusername = '';
$connectstr_dbpassword = '';

foreach ($_SERVER as $key => $value) {
    if (strpos($key, "MYSQLCONNSTR_") !== 0) {
        continue;
    }

    $connectstr_dbhost = preg_replace("/^.*Data Source=(.+?);.*$/", "\\1", $value);
    $connectstr_dbname = preg_replace("/^.*Database=(.+?);.*$/", "\\1", $value);
    $connectstr_dbusername = preg_replace("/^.*User Id=(.+?);.*$/", "\\1", $value);
    $connectstr_dbpassword = preg_replace("/^.*Password=(.+?)$/", "\\1", $value);
}

// ** MySQL settings - You can get this info from your web host ** //
/** The name of the database for WordPress */
define('DB_NAME', $connectstr_dbname);

/** MySQL database username */
define('DB_USER', $connectstr_dbusername);

/** MySQL database password */
define('DB_PASSWORD', $connectstr_dbpassword);

/** MySQL hostname */
define('DB_HOST', $connectstr_dbhost);
In short, rather than storing the values straight in the PHP file as plaintext, it’s pulling the variables from the Web Application’s local key value store. Unless you have access to that as well, this wp-config.php file by itself doesn’t do an attacker any good to try to access the database.
Most of the time, you should be able to get this to work without any modifications. One important exception is if you’re using a randomized table prefix. Open up your previous wp-config.php file and search for $table_prefix. You should see something like this
/**
 * WordPress Database Table prefix.
 *
 * You can have multiple installations in one database if you give each
 * a unique prefix. Only numbers, letters, and underscores please!
 */
$table_prefix  = 'wp_iuyyenw_';
If your table prefix is set to ‘wp_’ on your original website, you’re fine. If not, you’ll need to download the Azure wp-config.php file and modify it so the table prefix is set to be the same as your old site.
Installing phpMyAdmin
Alright, with that file upload chugging away in the background, let’s take a look at uploading the MySQL database. Fortunately, using the Web App extensions we can make this pretty painless.
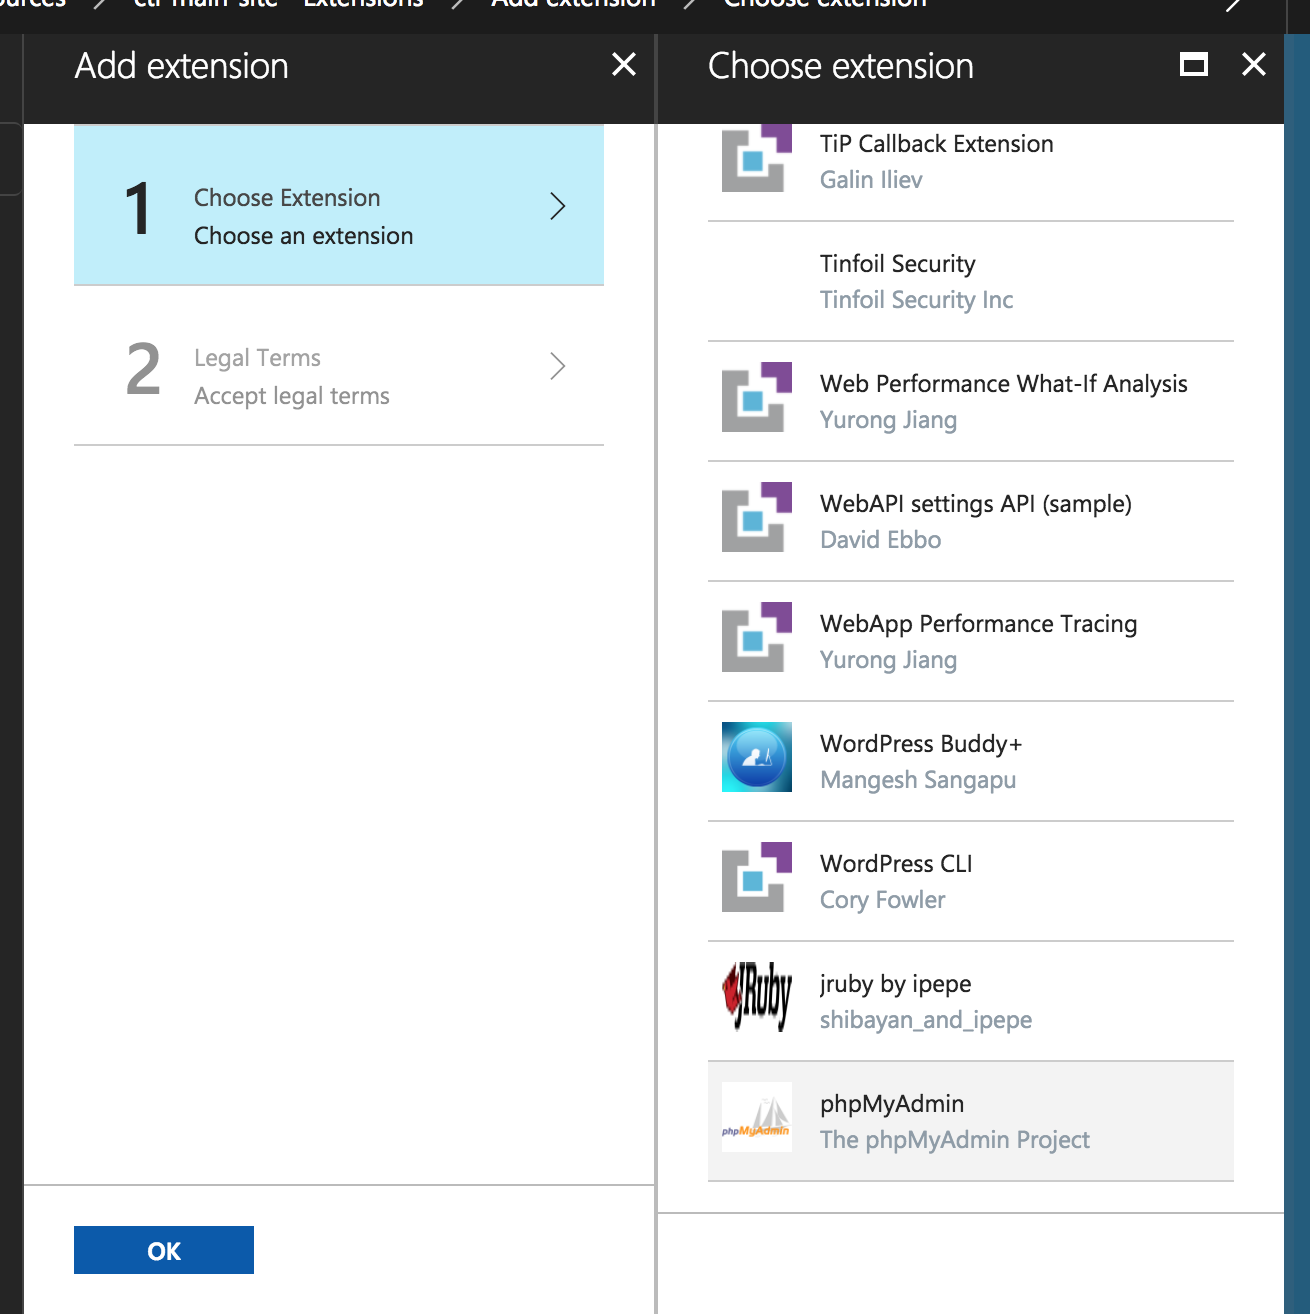
Go back to your App Service in the Azure console, scroll down the left hand side menu until you reach “Extensions” and hit the “+ Add” button at the top of the page
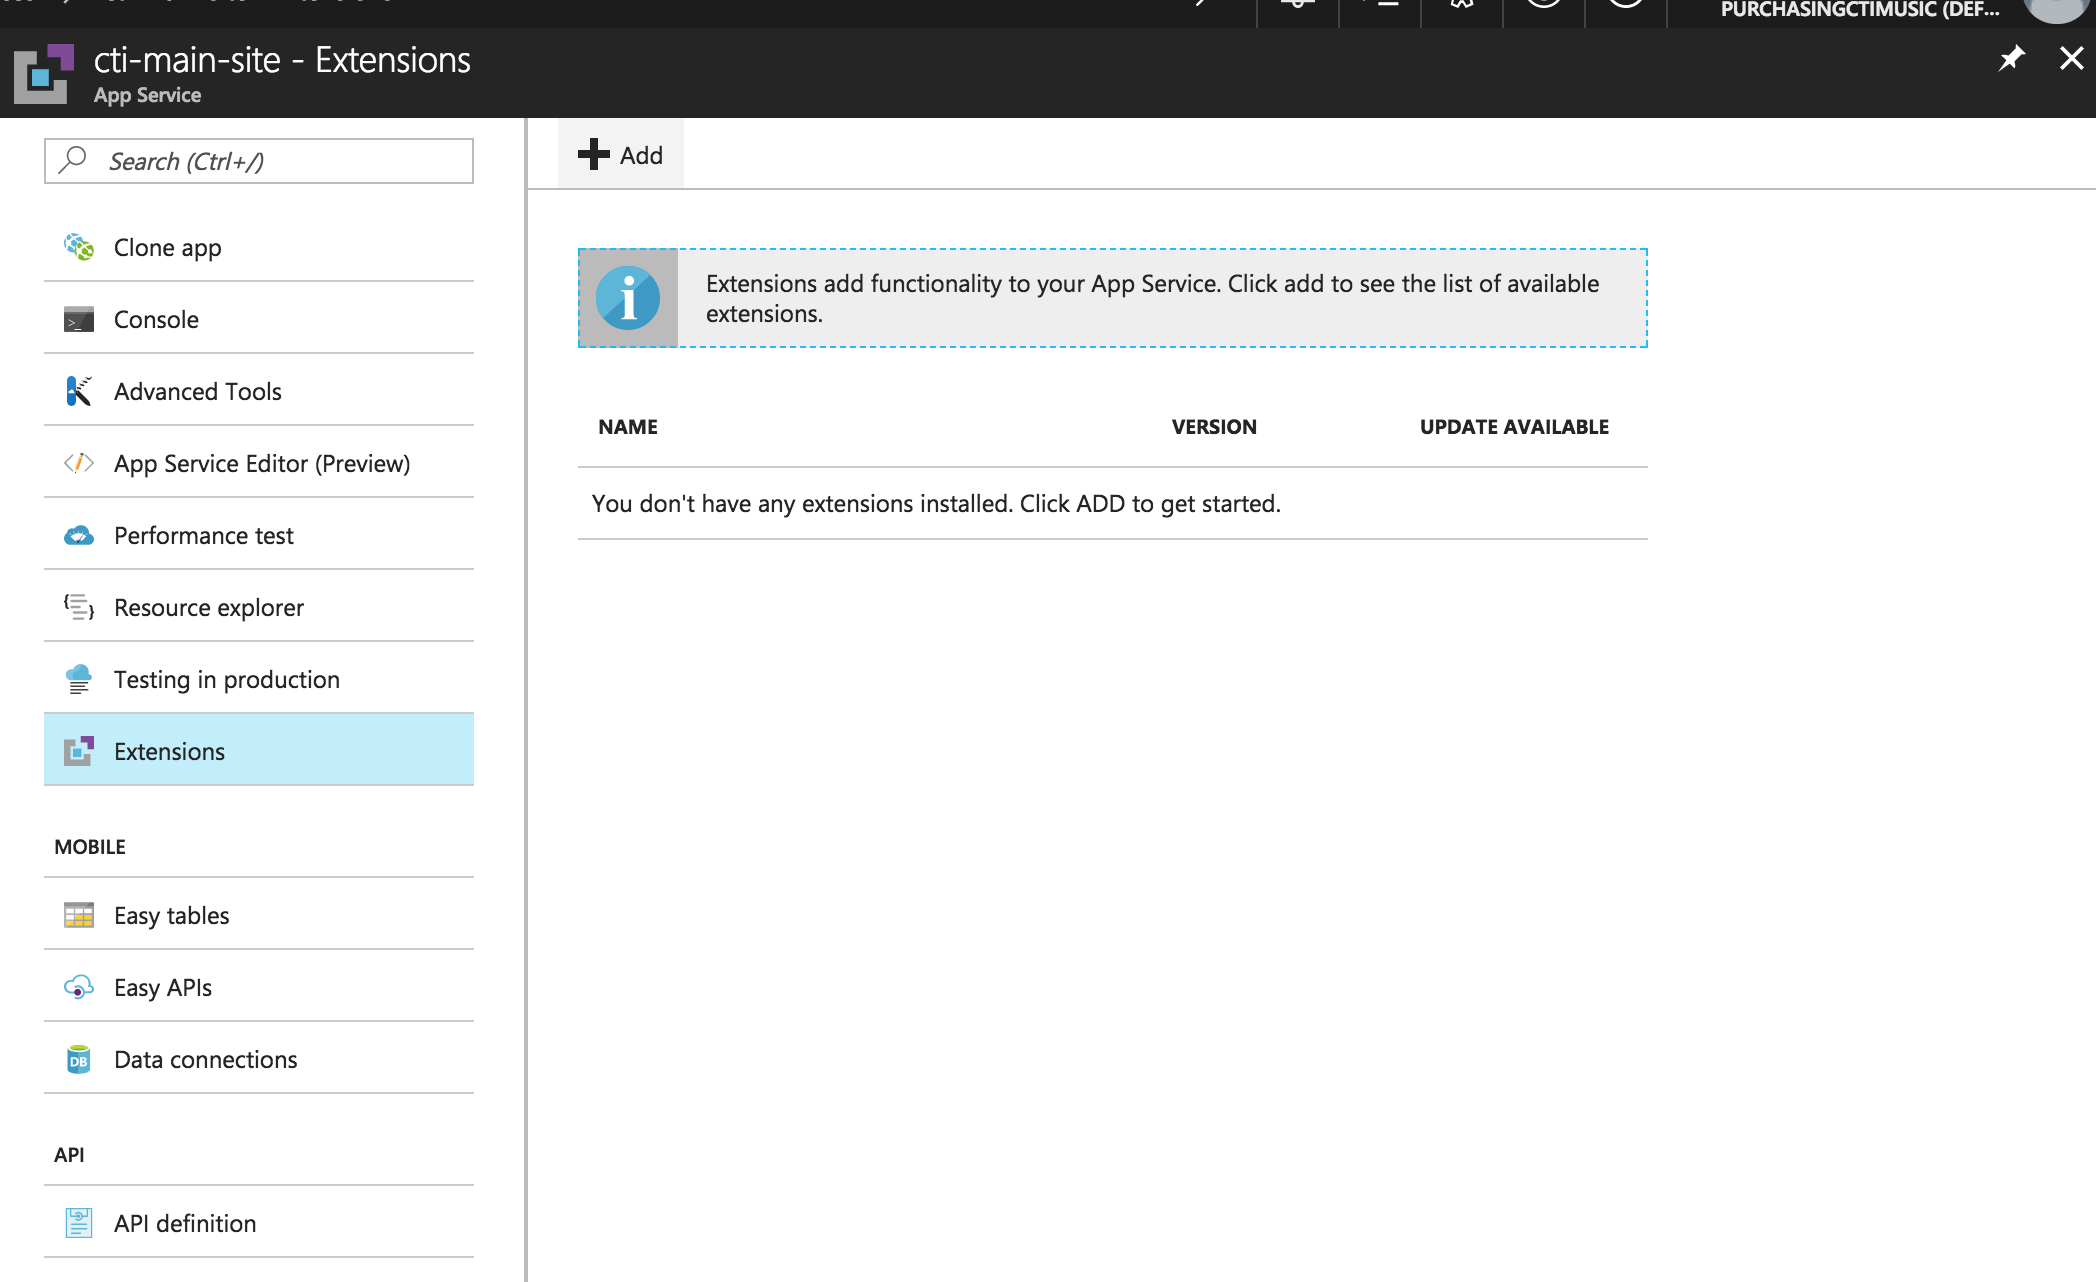
You’ll then be given a massive list of possible extensions to add. Search for “phpMyAdmin” and click on it.
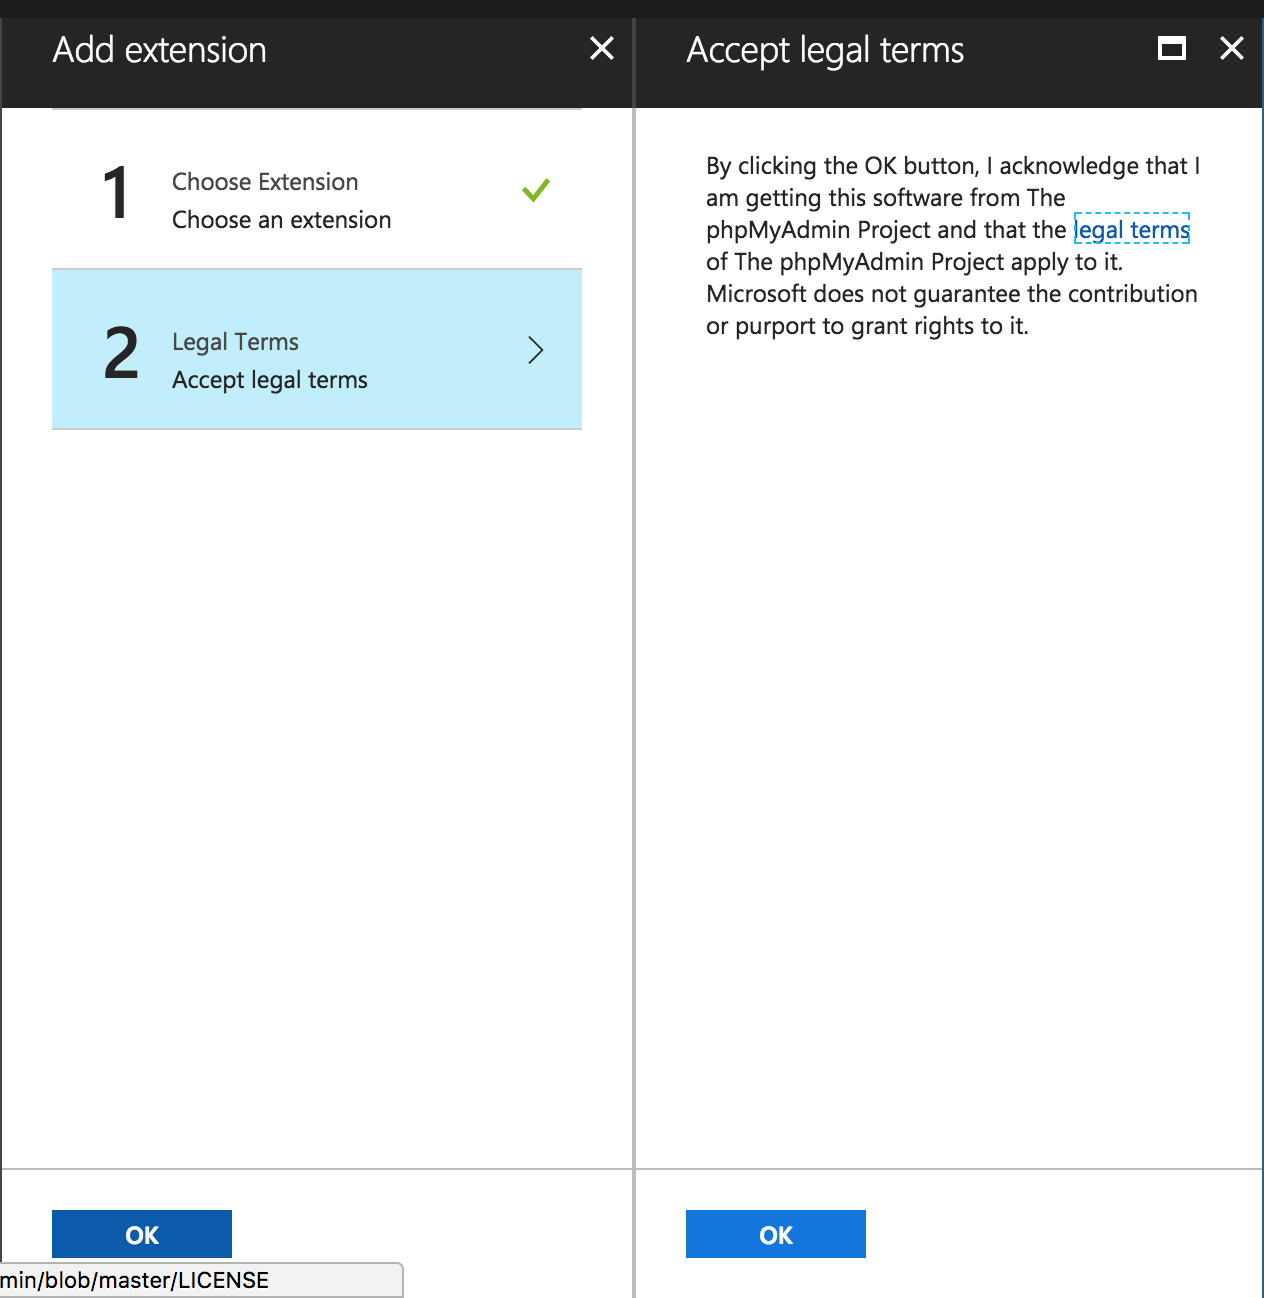
You’ll need to click OK on the legal terms.
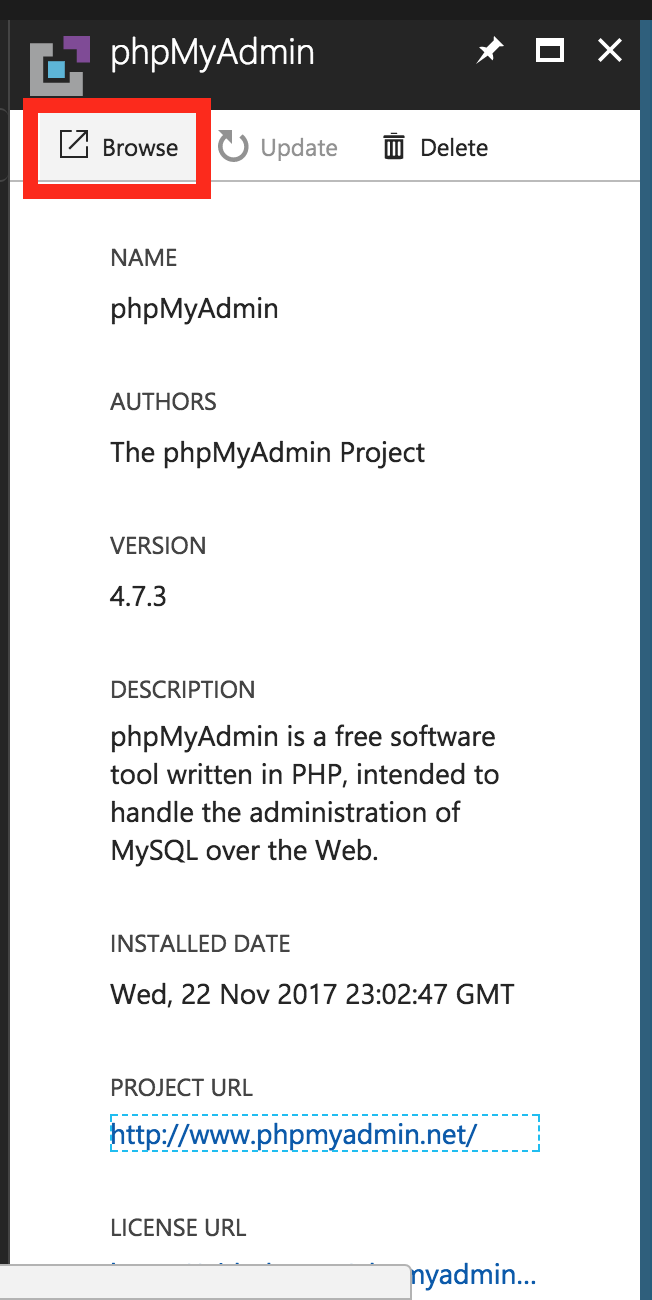
And then Azure will install the extension onto your web application. Once installed, click on the phpMyAdmin extension and hit “Browse” to access it.
Uploading your database
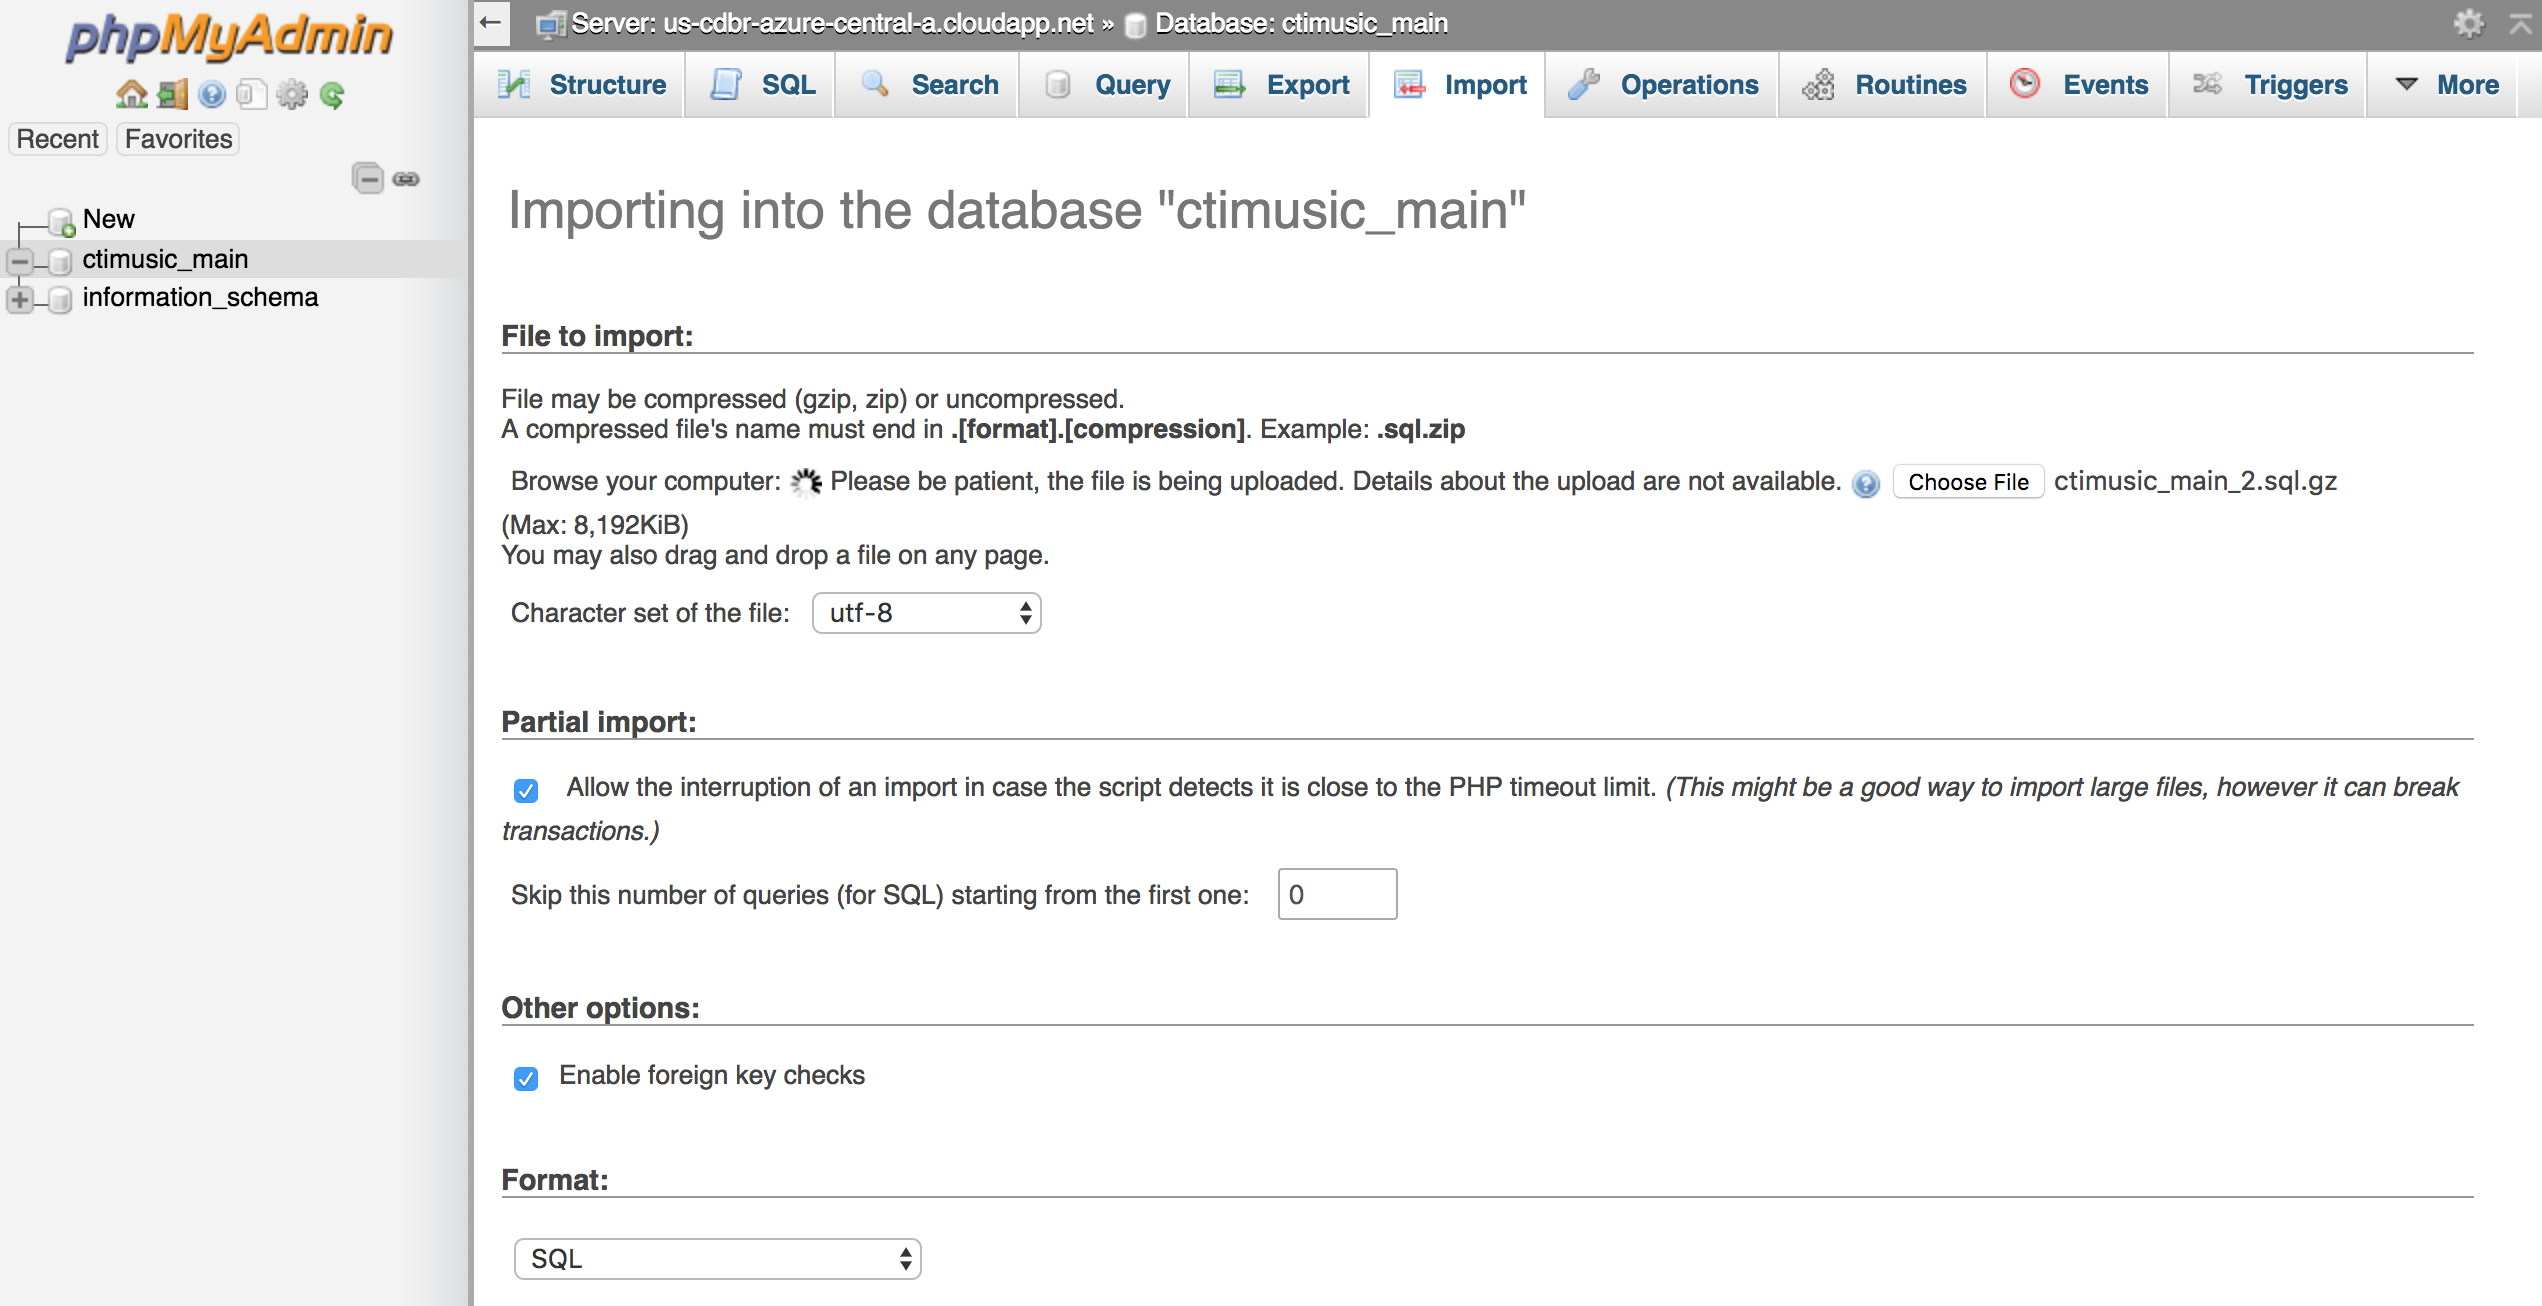
Once you’re logged in to phpMyAdmin, select your database name you chose on the left hand side (it should be the only item besides information_schema), click on the import tab, and select the sql database dump file from your backwpup backup. You can only upload 8MB, so if you sql file is larger than that, you can compress it into a zip file or tar.gz file and upload the compressed file. You can keep the defaults for everything else and just hit “go”
Some common database import errors
Did everything work out 100% awesome above? Good for you! Skip this section
#1030 Got error 1 from storage engine
Did you get an error that looks like this?
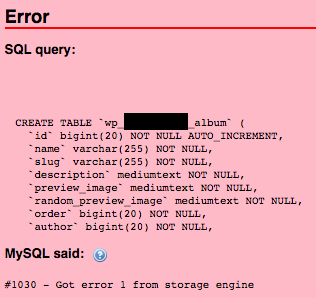
Turns out, that in making a managed MySQL service, the Azure DB for MySQL team make some technological choices to increase stability. One of those was to not support the MYISAM storage engine. If you try to import a MYISAM storage engine table into an Azure MySQL database, you’ll get this slightly cryptic and not entirely intuitive error.
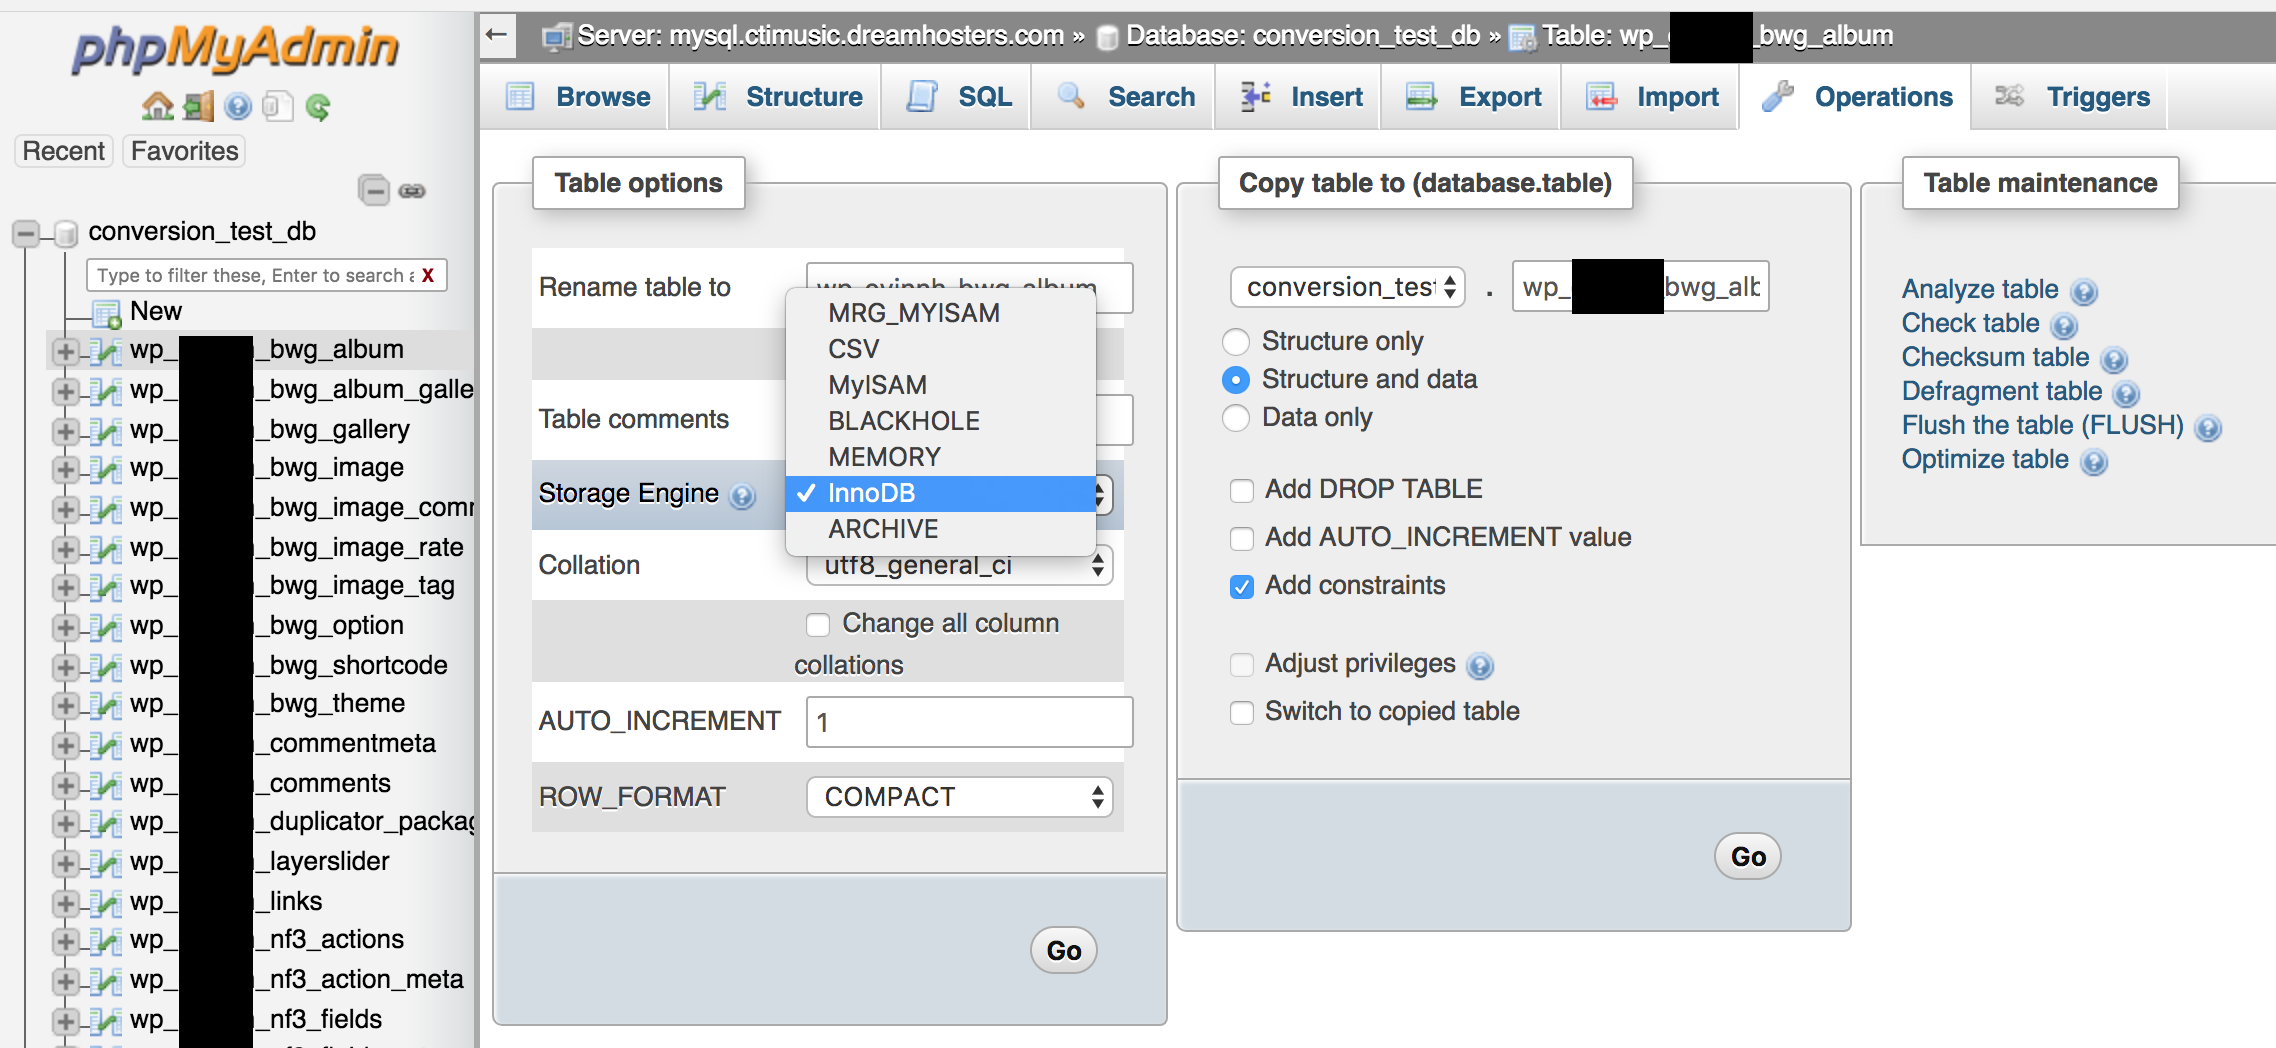
To solve this, we need to change the storage engine for any table in your database that uses MYISAM to InnoDB, the default for Azure. If you’re able to import your database into a different phpMyAdmin instance, (perhaps back on your original webhost) changing the storage engine is pretty simple. Click on the specific table, go to the “Operations” tab and there’s a drop down menu in the “Table options” section where you can select InnoDB as the new storage engine and hit the “Go” button underneath to convert it.
#1118 Row size too large
Another issue you may run into is a “row size too large” which looks something like this.
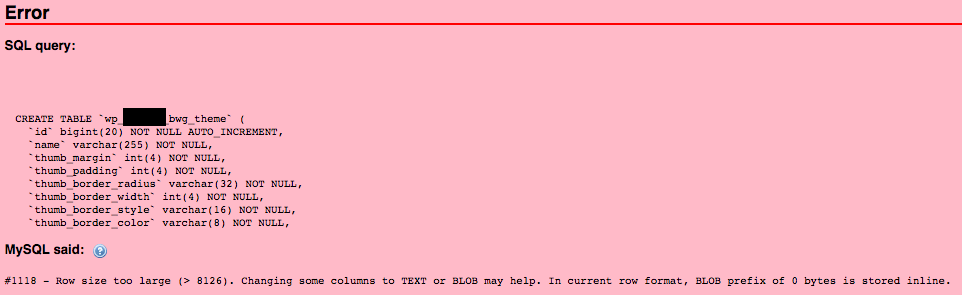
For us, it turned out that table was actually, just a really, really long table (like hundreds and hundreds of columns) that was installed by an old plugin we tried out and wasn’t cleared out when we uninstalled so we could just delete this table. Ironically, if it was actually installed a later version of the plugin it would have been fixed in a later patch. You shouldn’t see this from a a well authored plugin, and is not going to come from a core Wordpress table.
You might try troubleshooting this from the table name to see what plugin created it and see if it’s actually still one you use on your site, updating your plugins, and if one of your plugins still comes with a row size to large you might want to try reaching out to the plugin developer. Unfortunately, it’s not an option to increase the row size of the Azure MySQL database.
Setting the PHP Version
Now after all that, you still may not be done. If with your files uploaded and your database restored you still don’t see your site, your may be dealing with a conflict in the PHP version of your old site and your new Azure webapp. To change the PHP version go to your App Service and select “Application Settings” in the left hand side menu.
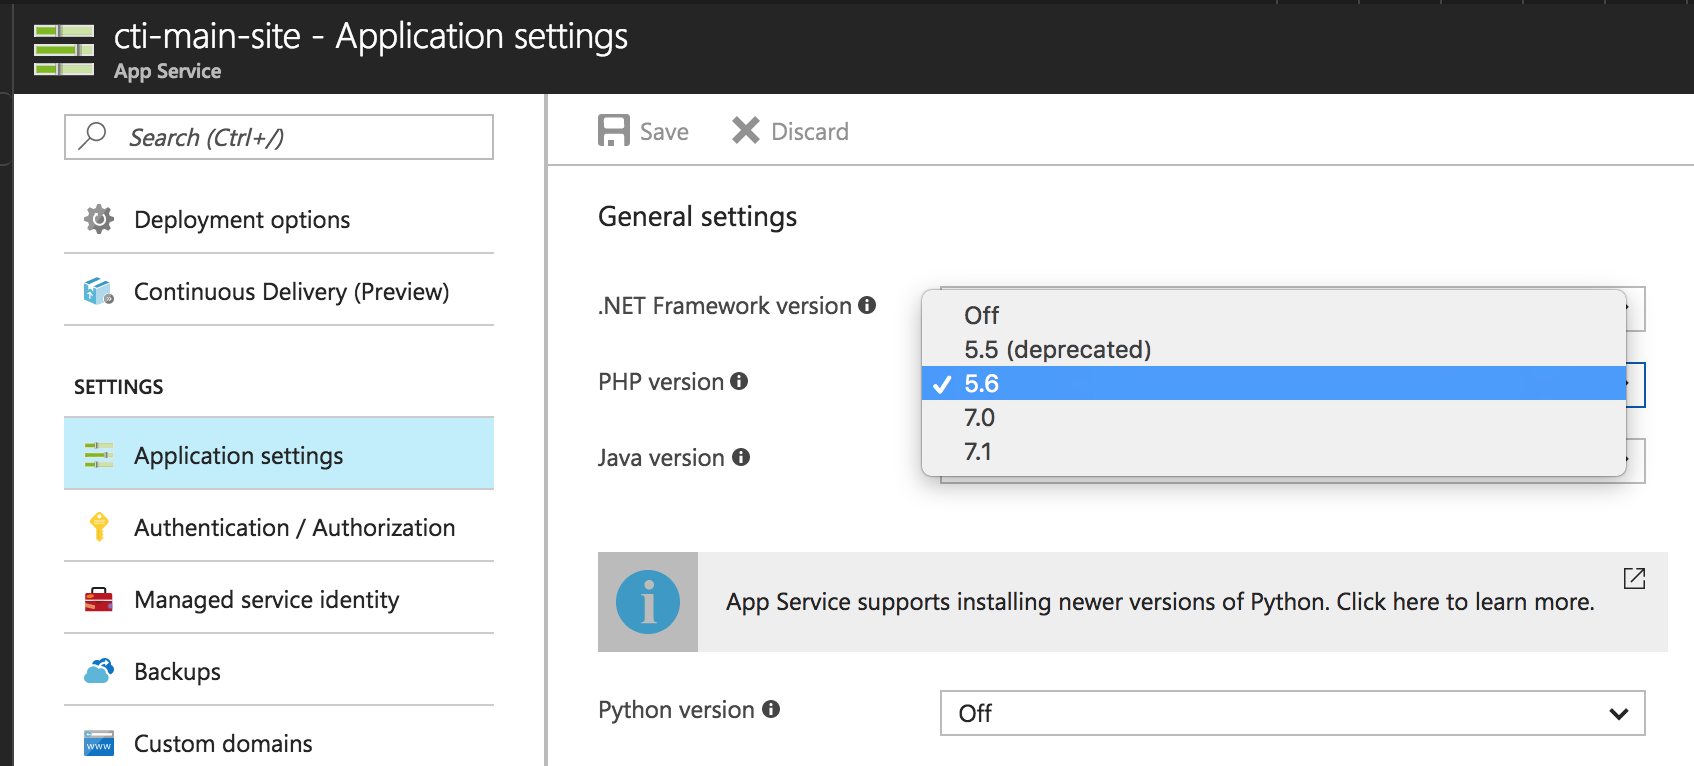
Azure defaults to the latest PHP 7, while my org’s site (and a bunch of other existing WordPress installs) were build on top of PHP 5.6. If your site gets a blank page (but you can hit the back end administration), try rolling the PHP version back to 5.6
Coming Soon - Part 2
Once everything is finished uploading, you should have a 100% fully functional copy of your previous WordPress installation running at app-name.azurewebsites.net. In part 2, I’ll cover making that cover your own custom domain name, adding automated Azure backups, and some of the specific ways I found to speed up Wordpress sites specifically running on Azure.
Edits
2017-10-22 - Updated the database section to move from ClearDB to Azure Databse for MySQL